Range Anxiety? Not really…

Elon Musk’s tweet (“@elonmuskTesla press conf at 9am on Thurs. About to end range anxiety … via OTA software update. Affects entire Model S fleet. March 15, 2015“) to end “range anxiety” which has since been deleted, had me thinking not about the disappointing announcements regarding the 6.2 software patches, but about when the last time was that I’ve actually experienced range anxiety.

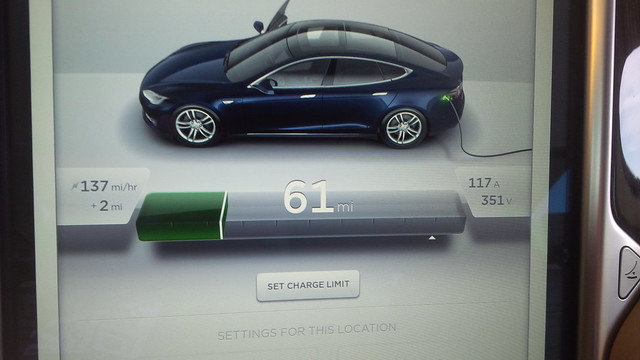
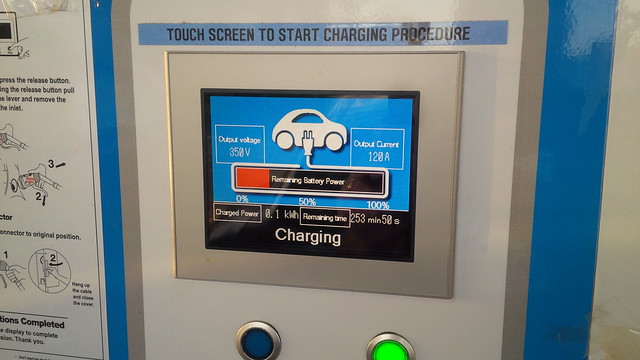
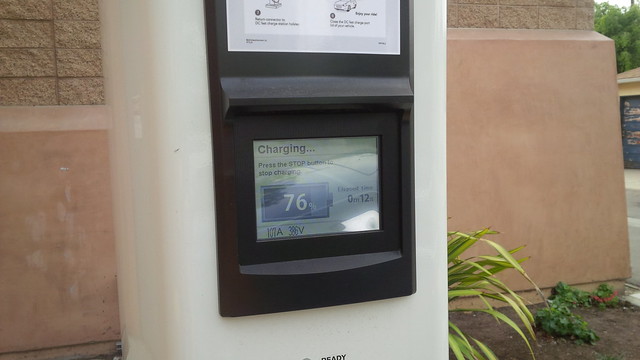
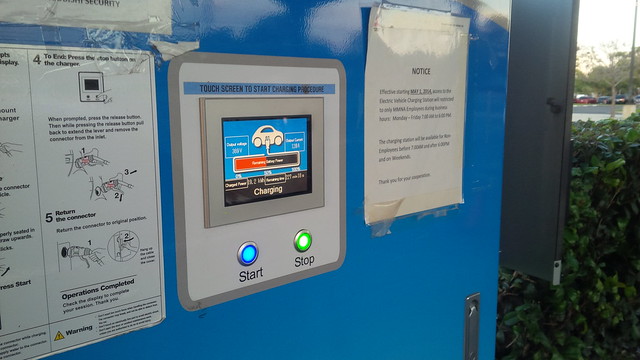
I must admit that it’s been a while for me. We decided to move to Tesla Motors electric vehicles because we didn’t want to have to worry about range. Both the Model S and Roadster have a range of at least 170 miles. As for recharging, using DC Charging, the Model S can Supercharge at over 300 miles per hour or quick charge using CHAdeMO over 130 miles per hour. Over AC charging, our Model S can go up to 80A (or approximately 58-62 miles per hour) and the Roadster can go up to 70A (or approximately 56 miles per hour). That’s plenty fast recharging. Besides, if you charge overnight, it’s time you’re spending sleeping anyway.

When we first started our adventure with electric vehicles with the Active E, range anxiety was a byproduct of moving from a nearly limitless range to one where each full charge lasted 80-100 miles. However, it wasn’t long that I was making the statement that the range of the Active E was limitless, as long as you can get charge and have the time to wait for a charge.  If a charger was available, I plugged in, even at 110V when no L2 was available.

It was not uncommon for me to do 140 mile days in the Active E. It required charging at multiple places, but L2 at 6.6 kW and later at 5.2 kW is not exactly speedy, but it isn’t slow either, at least at the time. Now that I’m used to Supercharging, quick charging, 40 Amp/10kW charging over a NEMA 14-50 or 6-50 connector, it seems that approximately 20 miles per hour seems so slow. Public charging in 2012 was fairly plentiful and easy to use in Southern California. Rarely did I have to wait, and most of the places that I found to charge at Level 2 were relatively free. Things became relatively harder at 2013. One could say that projecting the pending difficulty in obtaining public charging with shorter range electric vehicles definitely helped contribute to the decision to get Tesla Motors vehicles.

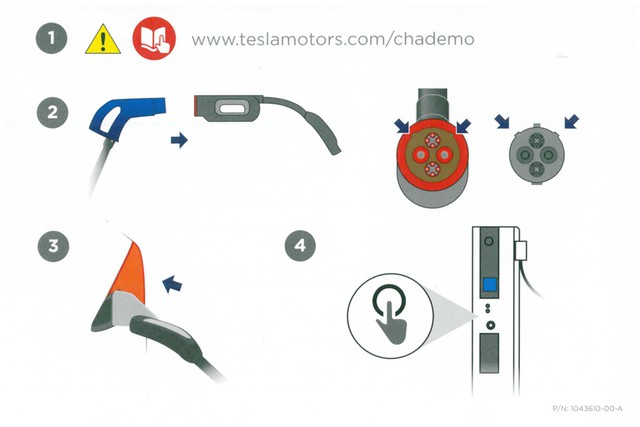
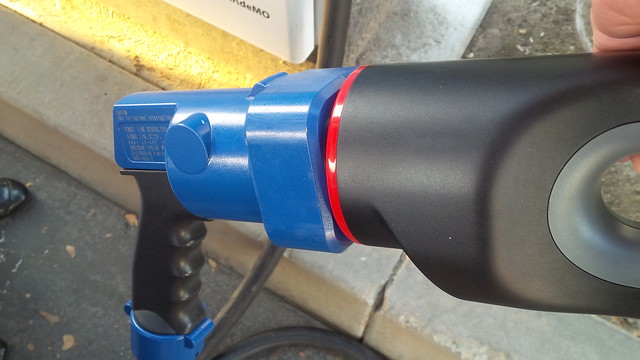
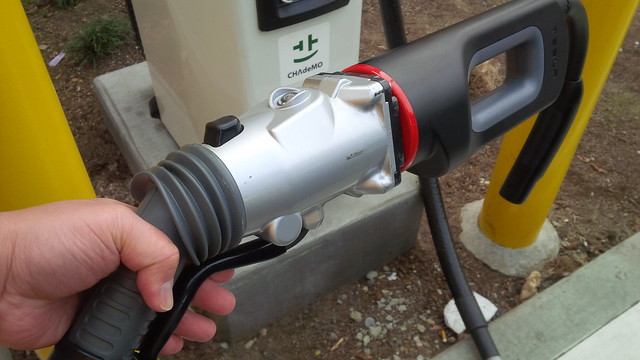
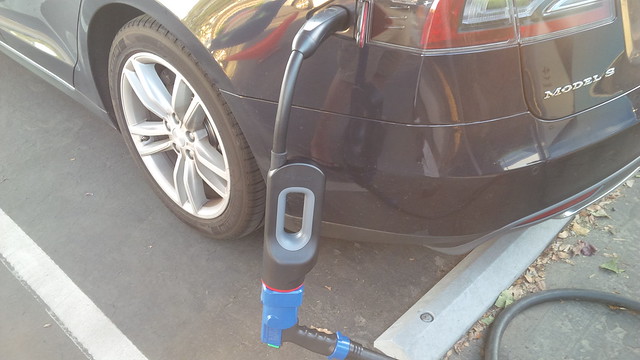
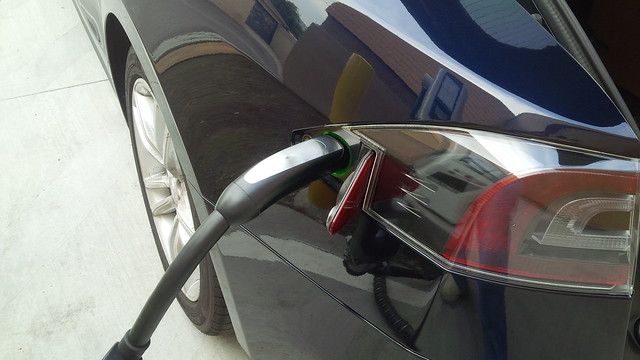
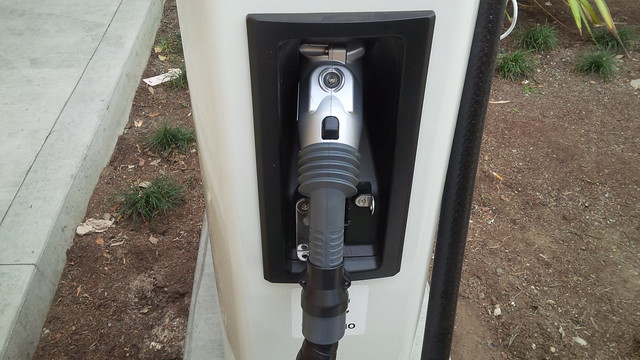
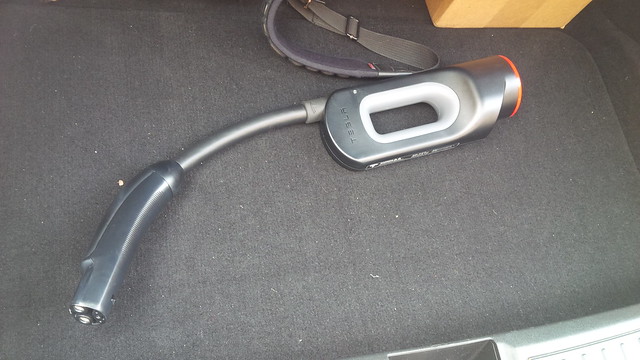
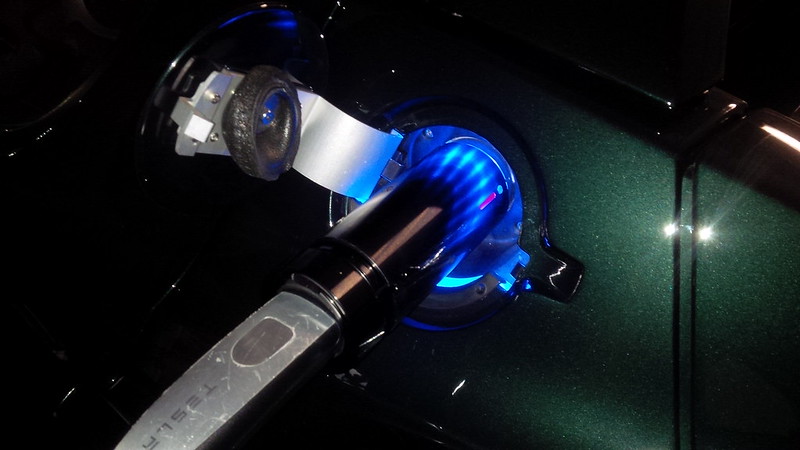
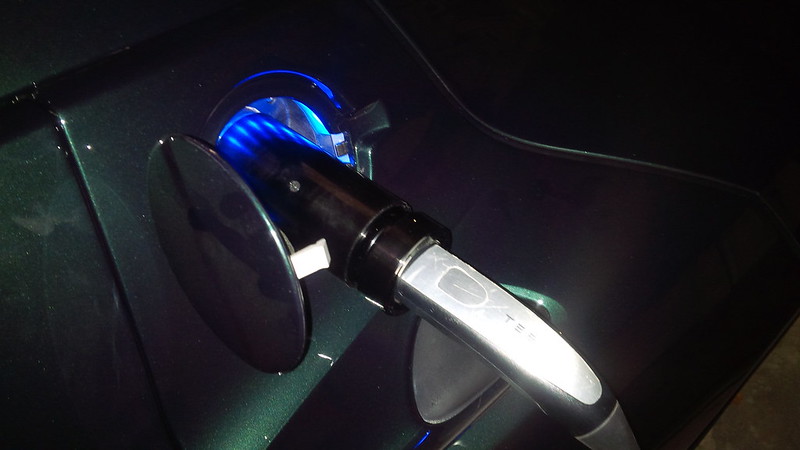
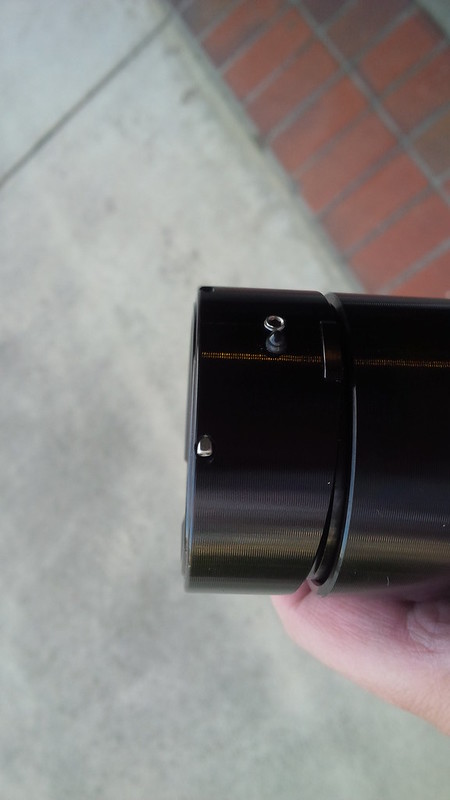
So, Range Anxiety with the Model S? Not really. One of the first things that I did when we first got our Model S and Roadster were to get some of the available charging adapters. Aside from J1772, we got adapters for NEMA 6-50 as well as NEMA 14-50. so that we could charge the car at up to 40A. Though the Model S (with dual chargers) and Roadster can go to 80A and 70A J1772 if presented with that speed. Plus, as I recently wrote, I just got CHAdeMO for our Model S, that’s a really respectable 130 miles per hour.

Which brings me to hyper-miling and Elon’s announcement.

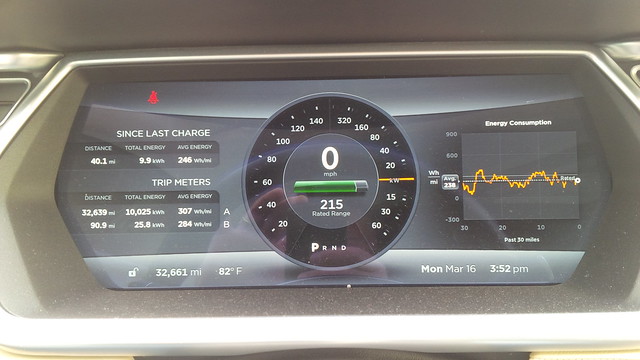
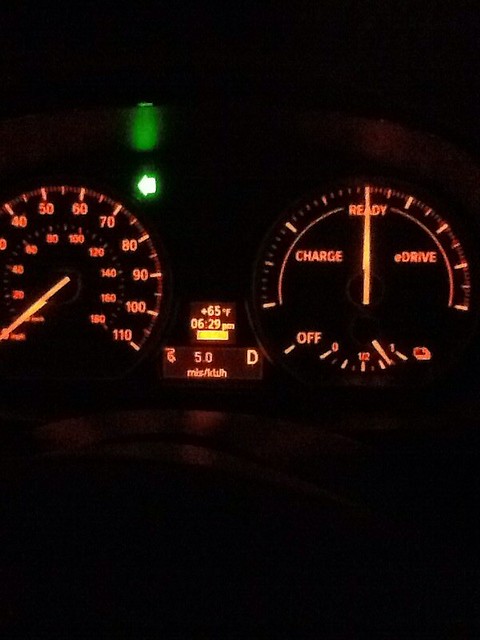
Hyper-miling is a skill that I learned about and learned to do when I first got the Active E. Getting the most miles per kWh was the goal (or consuming the least wH per mile as is the measure on the Model S, which I’ve measured at 307 wH per mile recently). In a nutshell, hyper-miling involves driving at a constant speed, or motor use and using larger vehicles, trucks, etc. ahead of you to lower the wind resistance that impacts your vehicle.  With the Active E and the size of the 1-series that it was adapted from, it was relatively easy to find vehicles that are “larger” than it to “drift” behind and it was noticeable to see the miles per kWh climb.  I’ve even hit a respectable 5.0 kWh (200 Wh per mile) on the Active E, as heavy as it is.

Untitled

My most recent trip to San Diego from Los Angeles County gave me a long time to ponder this thought and put a few things to test with the Model S. Since moving to the Model S, I really haven’t given hyper-miling any further thought. Until now.

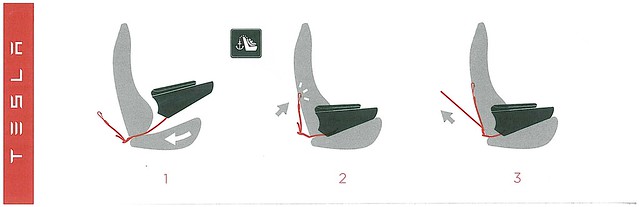
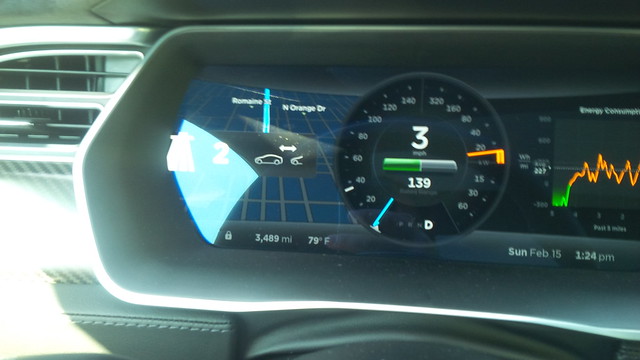
As more Model S roll off the factory floor in 2015 with Adaptive Cruise Control or Autopilot, I’ve been intrigued with the ability to set the number of car-lengths to the vehicle ahead of you (pictured below from a loaner I had driven a few weeks ago.) Figuring that such a feature really lends itself to hyper-miling.

IMG_20150215_132436

However, a more fundamental question presented itself to me. Can I even hyper-mile a Model S? So, during this same trip to San Diego, I followed a smaller delivery truck that was the ideal candidate for my test.

I started the drive making note of my average 30 mile consumption that is constantly graphed on my dash (as a preference that I’ve set.) See the example below.

IMG_20150305_231354

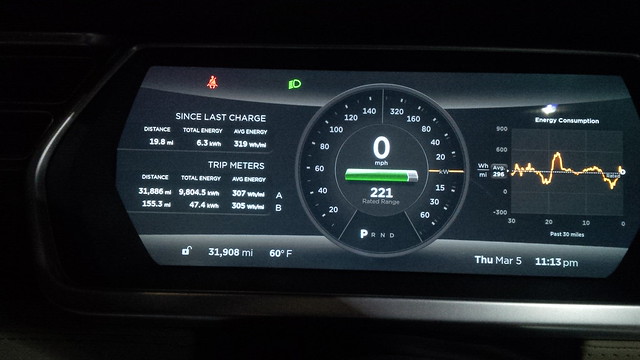
After getting my base (which, I did not record on photographs) I was in flowing traffic of around 75 mph at this point.

I decided to see what the effect was if I implememented hyper-miling techniques behind smaller vehicles. As predicted, it didn’t really help much. Too much of the wind resistance was not cut-down by the smaller vehicles.

Which leads me to try the test with the aforementioned small truck. I decided to pace the vehicle for about five miles and my average Wh per mile consumption during that period dropped at least 20 Wh per mile at a driving speed that was constant with the speed I was following smaller vehicles with.  Is that a lot?  Well, every bit counts and this was for five miles.

Physics doesn’t change, it’s just more difficult to find candidate vehicles to drift behind in a Model S. Next time, I’ll see if I can recreate the test using a loaner with Adaptive Cruise Control to see if I’m better than or if the Autopilot is at trying to hyper-mile. Granted, I have yet to set ACC at less than 2 car lengths for any distance, but that’s what I’ll have to do.

Oh and Range Anxiety, not really… I did that San Diego trip and back (220 miles RT) with no anxiety.

CHAdeMO to Tesla Model S charging adapter – Instructions and Review

A little over a year ago, I put my name on the waitlist for the CHAdeMO to Tesla Model S adapter. At the time, I was unsure whether I would need it or want it, but thought it would be good to get the option. At the time, Tesla wanted around $1,000 for the adapter, and it was very pricey. I figured that I could always turn it down when my number came up.

Well… Something happened between then and now.

Tesla dropped the price and my number was called. So… We said, “what the heck.”

Tesla does such a great job with the packaging for their accessories:

IMG_20150311_095329

IMG_20150311_095504

Tesla’s instructions are elegantly presented in the following pictograph:

CHAdeMO to Model S Instruction

Being a technical person, I found these pictographs to be well done and quite easy to follow. Now, I’m unsure whether they’re great fro non-technical people, but between this pictograph and the one provided for the Premium Rear Console, I have to tip my hat off to Tesla for providing very easy to follow instructions.

Step 1 is to order the product on the website.  Be aware that (at least in the United States) there is a waitlist (as of March 23, 2015).  When your number is called, you have to make the decision whether to order it or not.

Step 2 is to receive the box

Step 3 is to open the box, it’s nicely packed with the pictograph instructions above.

So, how do we use the CHAdeMO to Model S Adapter? Well, it depends on which CHAdeMO L3 Charger you’re using.  I chose to try the adapter with an Eaton CHAdeMO charger and a Nissan CHAdeMO charger because the two locations that I identified currently provide the charging without a fee.  Many of the Nissan CHAdeMOs have been converted to a pay system and require an RFID and payment to charge.  I have not yet used one of these.

Step 4 Attach the CHAdeMO cable from the L3 charger to the Adapter.

Make sure to align the notches appropriately, it won’t fit otherwise.

Here is the Eaton CHAdeMO pictured

IMG_20150314_181639

[Update as of 2015-07-15, wrote a post for the Efacec (the Evapower EV QC 50) that forks off the instructions from here.]

Step 5 is to mate the CHAdeMO to the CHAdeMO to Model S Adapter.

Here is the Eaton CHAdeMO pictured

IMG_20150314_181612

Seat the Eaton CHAdeMO to the Adapter and make sure that it is secure.

Here is the Nissan CHAdeMO pictured

IMG_20150318_161453

make sure to pull the trigger on the Nissan CHAdeMO to secure the piece to the adapter.

Step 6 is to plug the Adapter to the Model S.

Here is the Eaton CHAdeMO pictured

IMG_20150314_181655

Here is the Nissan CHAdeMO pictured

IMG_20150318_161521

Step 7 is to press start on the CHAdeMO Charger to initiate the charge.

Here is the Eaton CHAdeMO pictured

IMG_20150314_181734

Here is the Nissan CHAdeMO pictured

IMG_20150318_161511

It’s the blue START button, I forgot to take a picture of me pressing the button.

Step 8 Go back to the car or go about your business, but put a note on the car if you do leave so that anyone who needs to use the charger can contact you. Better yet, if you choose a note, let me recommend the EV Card from Plug In America or Jack Brown’s Take Charge and Go tags. Additionally, I would also recommend checking into Plugshare so that anyone looking at the location remotely will know that someone is charging, at the moment.

If you go back to the car, you will notice the charge speed of CHAdeMO

Here is the Eaton CHAdeMO charging the Model S pictured

From the Model S:

IMG_20150314_181850

From the Eaton CHAdeMO’s display:

IMG_20150314_181803

One of the things that you will notice that is different between the Eaton and the Nissan CHAdeMO station is that the Eaton provides an estimate of how long the charge will take to full. The Nissan one that I have found do not do the same.

Here is the Nissan CHAdeMO charging the Model S pictured

From the Model S:

IMG_20150318_161658

From the Nissan CHAdeMO’s display:

IMG_20150318_161536

Step 9 When done using the charger, press the STOP button

Here is the Eaton CHAdeMO pictured

IMG_20150314_184436

Here is the Nissan CHAdeMO pictured

IMG_20150318_163812

Step 10 Detach the Adapter from the charger’s CHAdeMO cable.

Here is the Eaton CHAdeMO pictured

IMG_20150314_181612

[I don’t remember if there was a button, but some of them do… press that to release.]

Here is the Nissan CHAdeMO pictured

Step 10A Slide the Grey lock away from the handle

IMG_20150318_163904

Step 10B Press the black button on “top” of the CHAdeMO cable. Make sure to be ready to catch the CHAdeMO to Model S Adapter.

IMG_20150318_163949

Step 11 Return the cable back to its proper location.

Here is the Eaton CHAdeMO pictured

IMG_20150314_181703

Here is the Nissan CHAdeMO pictured

IMG_20150318_164003

Step 12 Return your CHAdeMO to Model S Adapter back to your car and drive off.

IMG_20150318_164010

If you’re interested in more pictures of the CHAdeMO to Model S Adapter, here’s my flickr stream.

So, is the adapter worth $1,000? I probably wouldn’t have bought it for that much. However, since they dropped the price to $450, it came down to a price that is less than Henry Sharp’s CAN Adapters for the Roadster.

How useful is it? Well, on a recent trip to San Diego, I found a Nissan dealership (Pacific Nissan in Mission Bay) that allowed me to use their CHAdeMO. This is useful as Tesla has not completed the build out of the Supercharger down to San Diego. The nearest one is the San Juan Capistrano, one that is reported to be very busy with the seven SC stalls at the location.

Thanks for the quick charge @PacificNissan, you're a credit to the #EV community.  Letting a @TeslaMotors Model S charge!

IMG_20150320_095844

IMG_20150320_095832

It was quite useful since I arrived in the Mission Bay area about thirty minutes earlier than I expected to. I’m not sure how often I will need to use the adapter, but at $450, it was at a price point that is intriguing. The product is well-built, well documented, and works. Charging adapters are priceless when you need them in an emergency. There’s nothing more embarrassing than running out of charge.

Elon may think that the recently announced 6.2 firmware will end range anxiety, but I find the ability to charge at any rate is comforting. Even 110V at 3 miles per hour could work, in a pinch. But 130+ miles an hour over CHAdeMO is a bit better than 3 miles per hour.

Achievement Unlocked = 10MWh of EV driving on our Tesla Motors Model S

IMG_20150316_155255

Granted this photograph was after the round trip commute home (which is why the total was actually 10,025 kWh.)

We were at 32,571 at .8 kWh from the 10 MWh when I left home. It does figure to the 307 watt hours per mile, so it’s nice to check the math against the built in calculations.

Anyway, kinda anti-climactic after the 100,000 All EV Miles.

Rear passengers rolling in style… Premium Rear Console installation and review

Most of the time I drive alone or with my wife on our Model S. We rarely use the rear seats for passengers. However, when we do, it’s usually one or two other people, and rarely are we fitting three people in the vehicle. It’s nice to have the option to fit three people, but we often ride with less.

One of the complaints that is common to owners of Model S are the lack of cup holders in the vehicle. The rear part of the vehicle have no cup holders unless the owner of the Model S opts for a rather interesting solution from Tesla.

I was uninterested in this rear cup holder solution and was surprised when I found the Premium Rear Console on the http://shop.teslamotors.com/ site.

Since we rarely travel with five people, we figured that the Premium Rear Console from Tesla would provide some traveling in style for our passengers.

Installation

So, the installation instructions seemed simple enough.  The following pictograph was included in the shipment.

Tesla Rear Console Install

Lengthen the child-seat hook so that one can install it on the center seat position.

Click it in, and tighten. That’s it. Sounds simple enough.

Step 1 is to order the product on the website.

Step 2 is to receive the box

IMG_20150304_175155

Step 3 is to open the box, it’s nicely packed with the pictograph instructions

IMG_20150304_175320

The storage bag that comes with it is pretty nice.

IMG_20150304_175405

Here it is, unboxed –

IMG_20150304_175502

Here it is about to be installed…

Step 4 is to lengthen the hook and get it ready to slide under the center section to hook it on the center child restraint.

IMG_20150304_175623

IMG_20150304_175807

Here’s the hook.

IMG_20150304_180301

Step 5 is to hook it in

IMG_20150304_180358

Step 6 is to tighten the slack.

IMG_20150304_180417

Here it is installed.

IMG_20150304_180510

IMG_20150305_101215

An insert for small stuff

IMG_20150305_101228

Here’s the storage with the insert removed

IMG_20150305_101236

Storage with insert in place

IMG_20150305_101242

IMG_20150305_101302

Front view

IMG_20150305_102458

More pictures on my flickr album.

It took me about 20 minutes to install for the first time. This is going to go faster as I remove and re=install it in subsequent times.

I like it. Is it worth a starting price of $600. Somewhat pricey, but it works for us.

Quick update… after firmware patch.

So, the first 90% charge after the firmware of the Model S at 29,000 miles was updated from V6.0 (1.67.125) to V6.0 (2.0.81) and I was able to remotely verify that it was still holding at 226 miles for that charge. This is only a few days after the 29,000 Mile post (also, mileage is now 29,460).

The CAN JR and The CAN SR… Must have accessories for the Tesla Roadster

Elon Musk and Tesla Motors tweets regarding the upcoming demonstration of upgrading the Tesla Roadster to a 400 Mile Range has increased the interest in Roadster ownership. To continue further the previous post upon receipt of the CAN SR a few days back. Each version of the CAN is sold for $695 each and is well worth it.

What makes the CAN from Henry Sharp a valuable accesory is that it allows Roadster owners a nicer/smaller adapter to standard J1772. The Tesla produced product is rather bulky and a car like the Roadster space truly is a premium.

Here is a photo from Tesla (from their shop) of the Tesla produced adapter.

Tesla Roadster to J1772 adapter from Tesla

Whereas the CAN from Henry Sharp is rather compact.

This first picture is the J1772 side that the Roadster driver uses to plug the J1772 into.

IMG_2624

This second picture is the Roadster side that the Roadster driver uses to connect to the Car.

IMG_2625

You can see that the CAN is not much larger than a Blackberry Curve Telephone.

IMG_2623

And here is the CAN attached and charging a Roadster. To ensure that the CAN does NOT walk away at public stations, there are slots in place to place a small padlock into it.

IMG_20141107_080525

It works great with the JESLA from Tony Williams of QuickChargePower.

IMG_20141107_080519

IMG_20141107_080505

Henry’s been making the CAN JR for a while and have just released the CAN SR. The naming convention of JR and SR means that he’s converting J1772 to Roadster (for the JR) and SR is converting Tesla Model S to Roadster. Henry reluctantly released the SR because the testing showed a 95% success factor for Roadster 2.x and 99% success with Roadster 1.5 between Model S Chargers and Roadsters. (you can read the SR thread on teslamotorsclub.com)

Before purchasing the CAN SR, I would highly recommend that Roadster owners get the latest Firmware upgrade. There is a known bug between unpatched Roadsters and EVSEs that charge greater than 70 Amps. A fully configured Tesla Model S HPC is configured to run at 80 Amps and the Roadster, if unpatched, would be confused by that issue. The patch for this error has the Roadster understand an 80 Amp signal and drop the rate to 70 Amps, which is the maximum speed that a Roadster can handle.

This next picture is the Model S side that the Roadster driver uses to plug the Model S nozzle into.

IMG_20150107_103722

This once again is the side that plugs into the Roadster.

IMG_20150107_103734

Henry sends each CAN with a neoprene bag to protect and store the adapters into as pictured.

IMG_20150107_103752

Here is the CAN SR plugged in and getting ready to charge in our garage.

IMG_20150107_224844

IMG_20150107_224831

Lastly you can see the detail of the construction of the CAN SR. It’s a great accesory.

IMG_20150108_084734

IMG_20150108_084729

So, how do I use these adapters.

For the CAN JR

1) Attach the CAN JR to the Roadster
2) Plug the J1772 into the CAN.

IF in a public charging spot

3) I insert the padlock into the slot for the CAN to lock it in place.

4) If I need to interrupt charging to leave, I press the stop charging button on the VDI of the Roadster OR stop on the charger, otherwise, if it IS stopped, then proceed to the next steps.

IF in a public charging spot

5) I take the padlock off.

6) Unplug the J1772
7) Unplug the CAN, put can in the bag, and put the bag in the Roadster.

For the CAN SR

1) Attach the CAN SR to the Roadster
2) Plug the Model S nozzle into the CAN.

IF in a public charging spot

3) I insert the padlock into the slot for the CAN to lock it in place.

4) If I need to interrupt charging to leave, I press the stop charging button on the VDI of the Roadster OR stop on the charger, otherwise, if it IS stopped, then proceed to the next steps. I have not yet tried this, but according to Henry, I can pull the ring around the Model S nozzle to stop charging as well.

IF in a public charging spot

5) I take the padlock off.

6) Unplug the Model S adapter.
7) Unplug the CAN, put can in the bag, and put the bag in the Roadster.

There are very few “must haves” for the Roadster, and the CAN JR and SR are two of the things Roadster owners should consider owning.

Just got “The CAN SR”… A must-have “accessory” for the Tesla Roadster

A more in-depth review will follow, but thought to just share some pictures with you…

The CAN SR is Henry Sharp’s latest iteration of the CAN... (now renamed the CAN JR). The SR designates that the adapter will change a Tesla Model S plug to work with a Tesla Roadster. Whereas the original CAN adapted J1772 to Tesla Roadster.

Just got this at the office and thought to post some pictures of it.

Here is the end that the Model S connector goes into.

IMG_20150107_103722

Here is the end that connects to the Roadster

IMG_20150107_103734

And here is the whole thing in the protective bag that both the original CAN (JR) and now the CAN SR is sold with.

Per the Teslamotorsclub.com forum posts on the subject, it looks like it should work with about 99% of Model S Chargers out there for 1.5 Roadsters and about 95% for 2.x Roadsters.

Inconsistent Tesla Service at Tesla Service Centers… (make that Coffee service)

…You’ve been click baited! 😉

I’ve had service on our cars done at pretty much all the Los Angeles and Orange County service centers open by the end of 2014.

And I’ve found that the coffee service at all the centers have been inconsistent.

So, what are the levels of coffee service at the centers?  I have it in three levels.

The first level can be found at the (old, pre-late 2014) Costa Mesa, Torrance, and Van Nuys location.  And we’ll call this level the Good level of coffee service.  I enjoy K-Cups and these centers all used a well stocked, well maintained K-cup machines.

Here are pictures from Van Nuys and Torrance:

Torrance:

IMG_20140904_171519

Van Nuys:

IMG_20141012_120315

The previous Costa Mesa Service Center had similar machines as well.

The second level first debuted in the Los Angeles and Orange County service center areas at the large West Los Angeles Service Center on Centinela. I would call this the Better level of coffee service. These are similar to the automated espresso/coffee machines found at some airport lounges.

The same machine that debuted in Centinela is pictured here from the “new” Costa Mesa Service Center.

IMG_20140927_154854

IMG_20140927_154916

IMG_20140927_154906

In fact, if you don’t like coffee… These machines can also do Hot Chocolate

IMG_20140927_154947

Or perhaps you DO like different kinds of coffee and coffee drinks

IMG_20140927_154932

IMG_20140927_154939

or just coffee

IMG_20140927_154925

each of these options can be “boosted”

IMG_20140927_154954

However, what I’ve found is that the First one in the area continues to be the best one.

The original Service Center in West Los Angeles provide customers with the locations’ own Starbucks Gift Card to use to go and purchase Starbucks coffee from next door.

Now, this center continues to be rumored to be closing soon and be re-converted back into a showroom. So, until then, if you like Starbucks coffee and rate that as I do… Then, perhaps you would consider having your Tesla serviced at the West Los Angeles (Santa Monica Blvd.) location.

Tesla Roadster Boxing Day Email

TESLA
December 26th, 2014Hello [Mrs Pascual (after all Mr Pascual is chopped liver when it comes to Roadster stuff.)],

Roadster 3.0
Battery technology has continued a steady improvement in recent years, as has our experience in optimizing total vehicle efficiency. We have long been excited to apply our learning back to our first vehicle, and are thrilled to do just that with the prototype Roadster 3.0 package. It consists of three main improvement areas.

Batteries
The original Roadster battery was the very first lithium ion battery put into production in any vehicle. It was state of the art in 2008, but cell technology has improved substantially since then. We have identified a new cell that has 31% more energy than the original Roadster cell. Using this new cell we have created a battery pack that delivers roughly 70kWh in the same package as the original battery.

Aerodynamics
The original Roadster had a drag coefficient (Cd) of 0.36. Using modern computational methods we expect to make a 15% improvement, dropping the total Cd down to 0.31 with a retrofit aero kit.

Rolling Resistance
The original Roadster tires have a rolling resistance coefficient (Crr) of 11.0 kg/ton. New tires that we will use on the Roadster 3.0 have a Crr of roughly 8.9 kg/ton, about a 20% improvement. We are also making improvements in the wheel bearings and residual brake drag that further reduce overall rolling resistance of the car.

Summary
Combining all of these improvements we can achieve a predicted 40-50% improvement on range between the original Roadster and Roadster 3.0. There is a set of speeds and driving conditions where we can confidently drive the Roadster 3.0 over 400 miles. We will be demonstrating this in the real world during a non-stop drive from San Francisco to Los Angeles in the early weeks of 2015.

We are confident that this will not be the last update the Roadster will receive in the many years to come.

Happy Holidays.

Tesla Motors | 3500 Deer Creek Road | Palo Alto, CA 94304

One Year Model S Anniversary

IMG_20141108_150839

A year and about thirty minutes ago we picked up our Model S.

In that time, we’ve amassed 24,264 miles on the Model S. Less than we did with the Active E, but considering we’ve had our Roadster for about 14.25 months, we also got about 11,379 miles on the Roadster, that’s really a greater total of EV miles than we did after our first Active E year.

[One thing I noticed after updating with a picture of the mileage is my actual driven miles (Trip A is 24,242… Funny)]

I’ll sit and think about it later. But for now!

Cheers!

(If you’re interested in reliving our Model S weekend… It starts here. Or when we actually picked up the Model S.)