Home Electric Vehicle Charging Solutions

We had the opportunity to upgrade and make some changes to our home Electric Vehicle (EV) charging setup and thought to share that with you.

I went back to look at my posts to see if I could update what I thought I had written about in the past.  It turns out that I must have shared this information to the public via forum posts and not on the blog, so I figured to go over home charging today.

As a long-time multi-EV owner, one of the things that we’ve setup at our home is the ability to charge our EVs at the same time. This can be as simple as running several 120V plugs, but when you drive the miles that we had on our daily commute, 120V service is just not enough.  As a result, we’ve made accommodations to upgrade our EV charging to varying grades of 240V service.

So, to explain what I mean by varying grades of 240V service, I need to go off on a short tangent, I’m not an electrician, but having been involved with EVs for over four years has made me understand some EV basics.

1) Battery capacity and EV range is measured in kWh of storage (your consumption rate determines what that range is in miles or kilometers.)  This is why the Model S and Model X is sold with differing models corresponding with battery size.

2) The speed to re-fill this battery capacity is measured in several ways, but basically in kW of power.  The higher the number, the faster that a car can charge. So, this kW maximum for a charger is the amount of Volts multiplied by the Amps of the service.  Furthermore, an EV charges at 80% of the total Amperage that the circuit is rated for, so a 40A circuit can use a maximum of 32A to charge.

On a basic, common North American plug outlet, 120 Volt x 15 Amp service, an EV driver can use 120V x 12A = 1.44 kW of power.  (On Model S, this is a maximum of 4 miles per hour charge rate, under ideal conditions.)  It is interesting to note that many early EVs of this current generation (2011 and 2012 Nissan LEAF and Chevy Volts) had a 3.3 kW charger.  Even though, I believe, previous generations of EVs (GM EV-1, RAV4 1st gen, etc.) had 6.6 kW charging.  Many current EVs now provide at least a 6.6 kW charger.

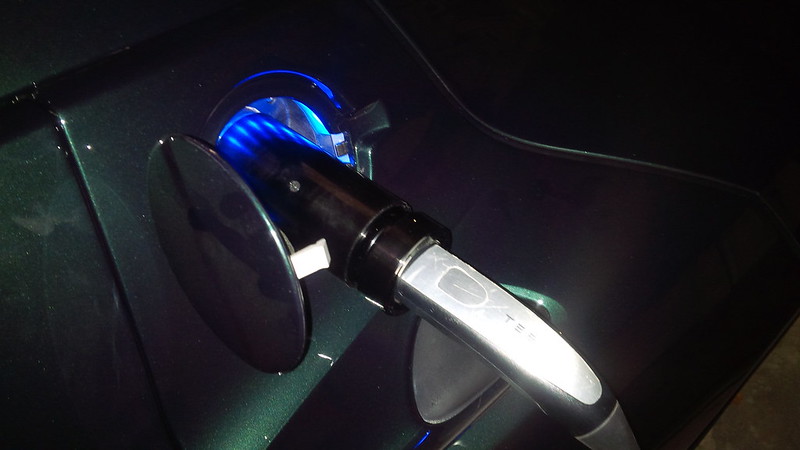
Our old ActiveE was rated at 7.2 kW (originally, but by the end this was de-rated closer to 5.5 kW by software because of some issues.)  My wife’s Roadster has a 16.8 kW charger and our Model S is equipped with dual chargers for a total of 20 kW charging capability.

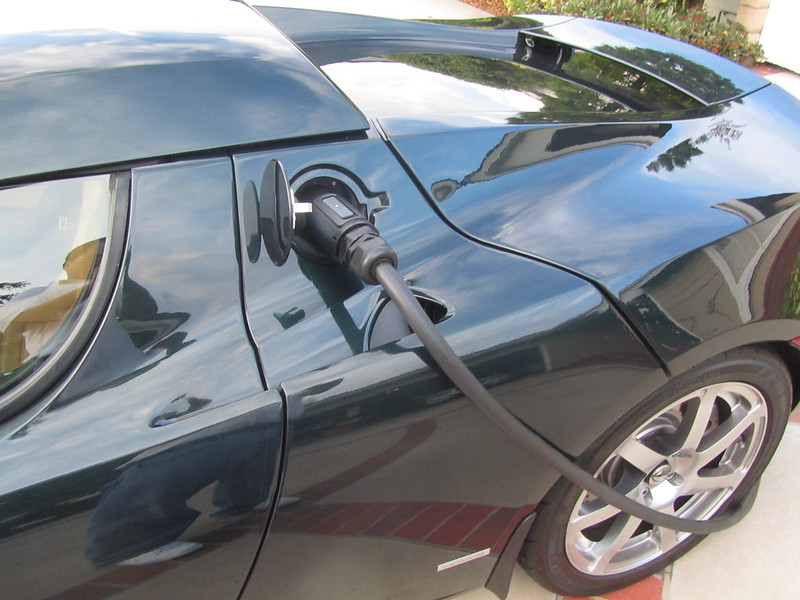
That being said, the higher the voltage one uses the amperage of the wire has to increase to give you a quicker charge.  So, to get a 16.8 kW service for the Roadster to run at full speed the Electric Vehicle Supply equipment (EVSE/i.e. electric vehicle charger) has to have a 90 Amp circuit to run at 70 Amps continuously over 240V.  (Remember the 80% rule for charging.)  So, to get the 20 kW charger to work on a Model S, a 100 Amp wire and breaker needs to run to get that going (19.2 kW, but who’s counting.)

I digress… Back to the point…  The higher the amperage for the circuit installed, the thicker AND more expensive the wire will be.

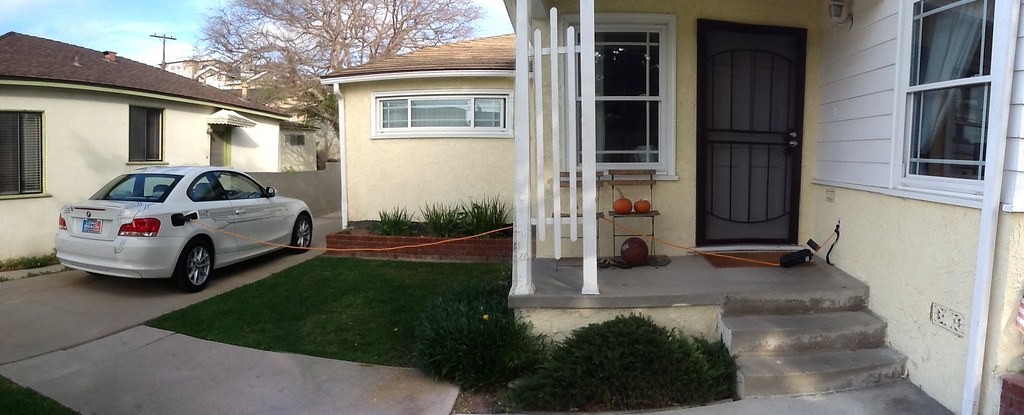
I am sure that for my North American EV readers, many have one EV plug to provide 240V service charge their car. How many places to charge 240V do you have at home? When we first took delivery of our BMW Active E in 2012, we didn’t have a single 240V service installed in our garage.

We actually spent a few weeks charging the car on 120V.  Something that those of us that follow Thomas J. Thias (the Amazing Chevy Volt) on Twitter see him espouse the greater than 1.5 Billion charging locations at this voltage in North America – 120V regular outlets (at 1-4 miles per hour, not normally relevant to me, but as Thomas reminds us, it’s a “good enough” solution for 80% of the drivers on their average commute.)

Just this evening, September 27, 2016, Thomas Tweeted the following out (in reply to a ZeroMC tweet)

New BMW ActiveE first night at home 2/23. 5

New BMW ActiveE first night at home 2/23. 4

We’ve even used the same Level 1 charger when we visited family…

Visiting family with our new @BMWActiveE and using the included Level 1 charger stretched to the limit!

Needless to say, that got old FAST…

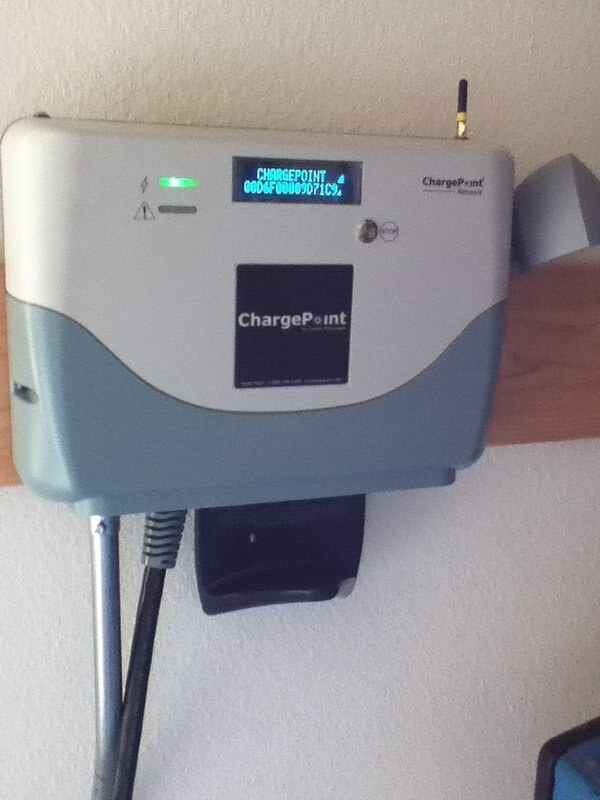
So, two weeks later, we took advantage of a grant in 2012 and got a Chargepoint CT-500 (back when the company known as Chargepoint was called Coulomb Technologies.)

There was a grant program available for new EV owners/lessors to take advantage of that covered the cost of the EVSE and some of the installation.  The Chargepoint CT-500 was an intelligent/networked EVSE that connected to the Internet over a mobile network (2G?!?) connection and part of the bargain was that the government and researchers can glean the information about the habits of the participants in the grant program.

Since EVSEs in 2012 were over a thousand dollars, we opted to participate in this program and had our first charger installed.  We expected it to be a 32A EVSE, (80% of the 40A circuit that was installed) but it was actually a 30A Level 2 station. The total cost of the EVSE and Installation was $1,640. However, there was a state program that covered $1,200. Which meant that we were liable for $440 (plus $150 permit) for a total of $590 for the cost of our hardwired Level 2 station (plus the loss of privacy by participating in this monitored program.)

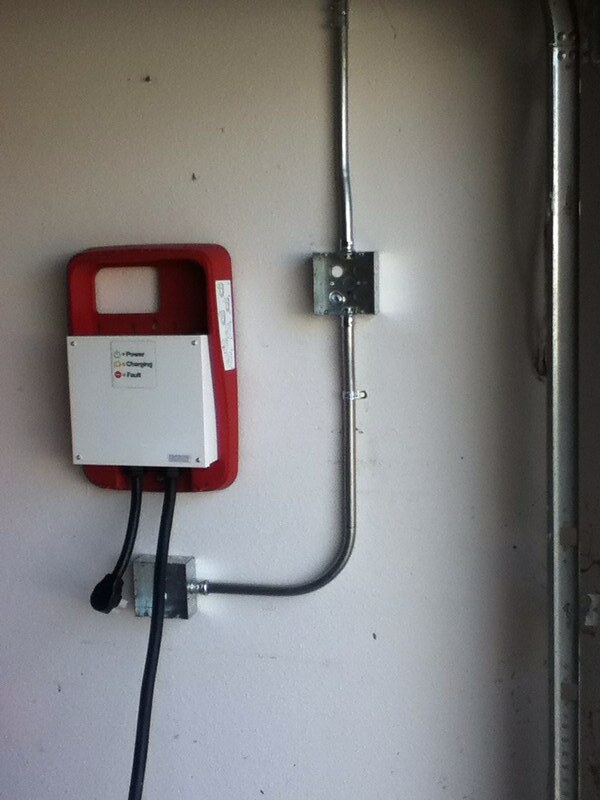
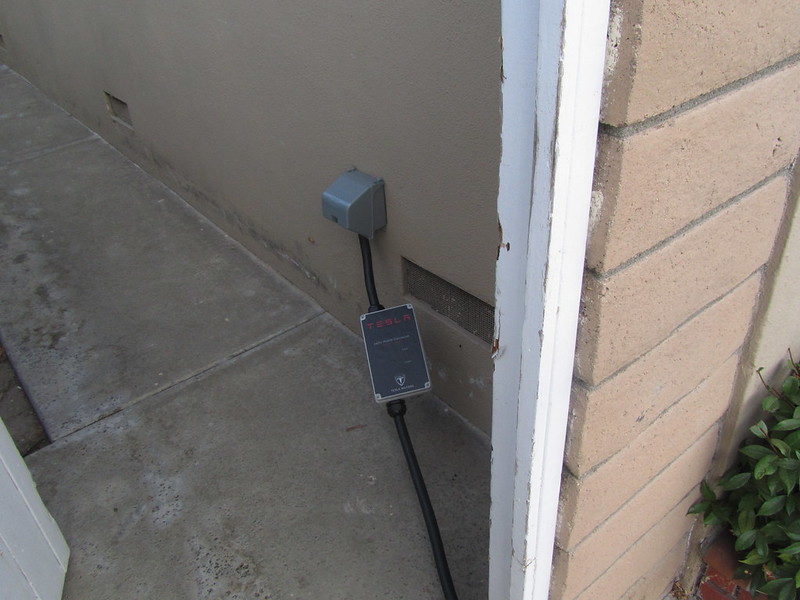
Here is the CT-500 when it was first installed.

CT500 EVSE Install 1

To install the units, we had to use Clean Fuel Connection and their sub-contractors for the work and it was a pretty painless program. After signing the contract they were at our house two days later with the EVSE and our days of charging Level 1 was put in the back burner.

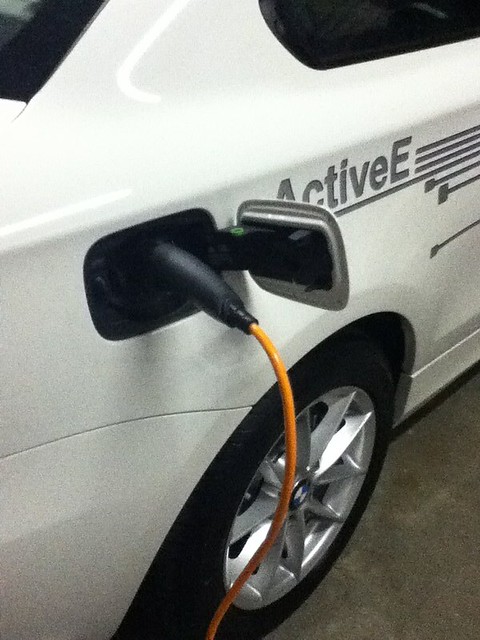
The charger was hardwired and the installers did a great job.

CT500 EVSE Install 5

Untitled

Here it is on the day we first installed the EVSE and we charged the Active E on that first Level 2 charger.

IMG_1044

With this Level 2 setup and public Level 2 charging we were able to drive the Active E 54,321 total miles during the two years of the lease.  Several years later, the intelligent features of this charger became unsupported because the mobile network that the signals rode on was being decommissioned by AT&T.  So, today, we’ve lost the “smart” functionality of the charger, but it still works great with the Model S.  So, our first dedicated EV charger was installed in March 2012.

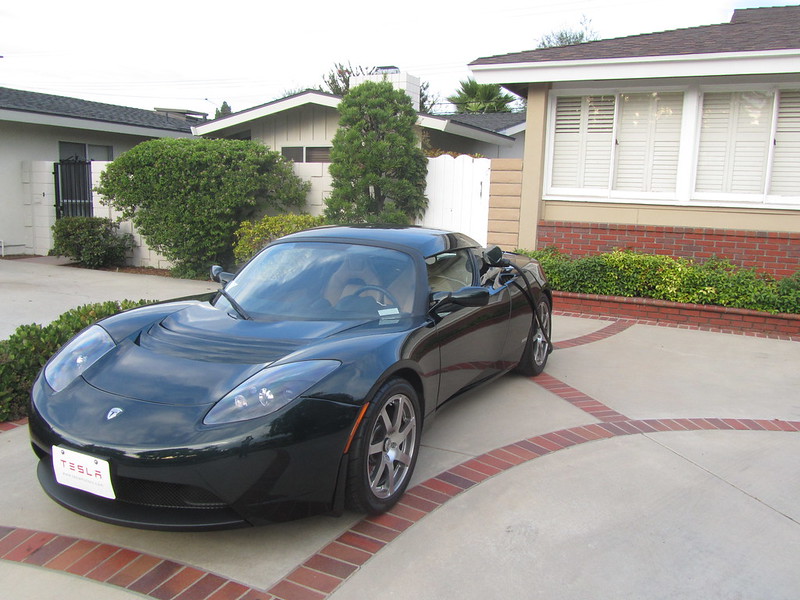
A year and a half after we started driving the Active E, we purchased my wife’s Roadster and finalized the order for our Model S.  Since we were already “experienced” rEVolutionaries.  We had a good idea of what it takes to charge a car and how long it took to do so.  We decided to install several NEMA outlets in the house, two NEMA 14-50 outlets and one NEMA 6-50.  We picked the NEMA 6-50 because, in 2013, the first “plug” ready non-Tesla EVSEs were being produced and we wanted to be able to charge “anything” off that and didn’t feel the need to recover miles faster than a 50 Amp feed on either the Roadster that we took or the Model S that was soon to arrive in November 2013.  The approximately 25 miles per hour that we anticipated to recover on a 50 Amp circuit (40 Amps usable) was going to be enough for our drive.

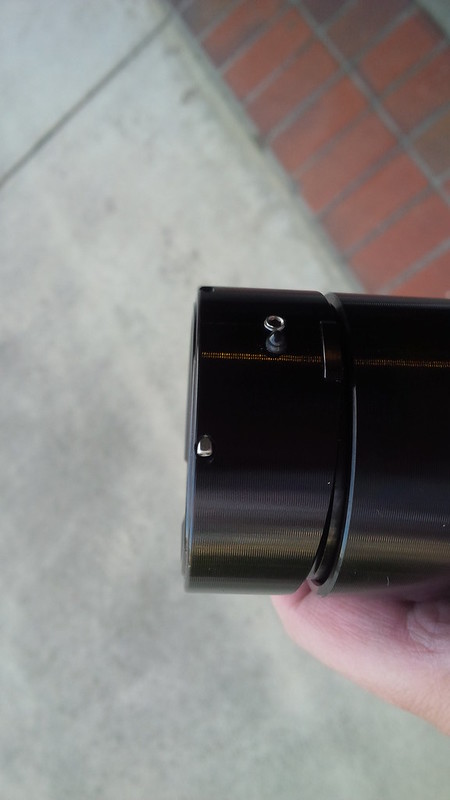
When we originally ordered our Roadster, we were unsure as to what sort of charging we would get with it that we ordered a Leviton 40A EVSE to deliver the wire speed of the NEMA 6-50 at full speed.  Here is that Leviton being installed for the Roadster to use on its side of the garage.  At the time of the purchase, this EVSE was selling for approximately $1200 elsewhere and Amazon sold the same model for $1050.  In 2016, this same EVSE is now $699.

Untitled

The EVSE powered up.  However, we ended up returning the Leviton EVSE as it was incompatible with the BMW Active E and made some WEIRD noises and sounded like it was having a BAD time, electrically speaking.  Furthermore, it turned out that we were going to get a Roadster MC240 with my wife’s car, so that can take full use of the NEMA 6-50 that we installed for the Leviton EVSE.  (We just needed an adapter to go from NEMA 14-50 to NEMA 6-50 that we had made for us.)  We charged the car on this MC240 for a short while (Tesla actually stepped down the charge from 40A to 30A on the MC240 on a 50A circuit) because we wanted a faster recharge time, so we found another Roadster owner selling their Roadster UMC and purchased that unit with a 6-50 Adapter to fit directly onto the circuit that our electrician installed for the Leviton.  And used that equipment to continue to charge the Roadster until today.

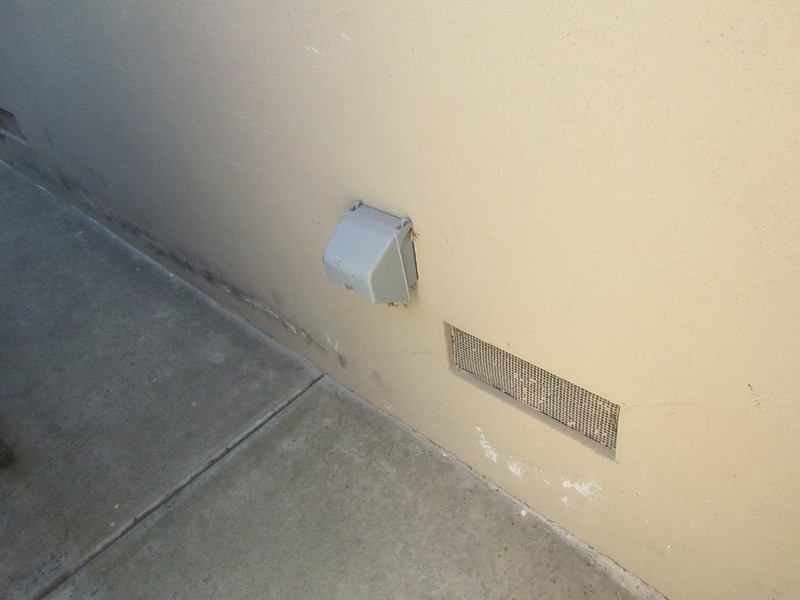
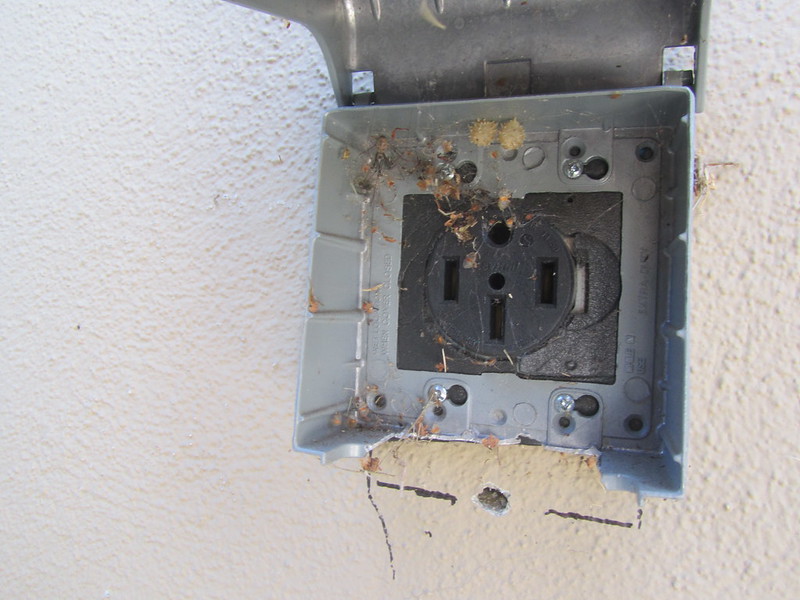
Here is a photo of the NEMA 14-50 outlet on the other side of the garage from the NEMA 6-50 installed for the Roadster.

IMG_7426

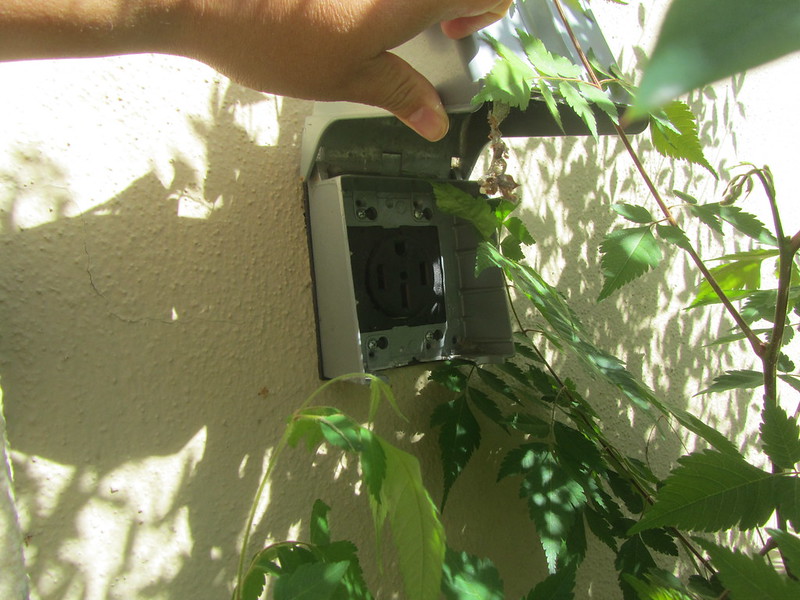
We wanted to makes sure to protect it from the elements.

IMG_7425

When we were having our electrician wire up the outlet for the Roadster, we wanted to future-proof  that location and asked to have 70A service pulled in.  To maximize the 70A breaker, we split that wire to two NEMA connectors the one (NEMA 6-50) in the garage for the Roadster and another one on the outside wall of the garage (a NEMA 14-50.)  This sharing of the one breaker is not really the “code” for these connections.  However, as long as we manually manage the Amperage on the line when using two different vehicles on each of the NEMA connectors, we should be fine.  (Remember the 80% rule, so a 70 Amp breaker means that we don’t draw more than 56A continuously on the circuit.) One of the benefits of driving any Tesla is its ability to be managed “downward” on the amount of current to draw from a circuit.  So, if a newer 6.6 kW Leaf were to be plugged into that receptacle and draw 32A, we still have 24A to use for the Roadster or the Model S.

As I mentioned earlier, we lucked out when we took delivery of our Roadster, we were provided with an original MC240 (which works only with the 1.5 Roadster) and we shortly thereafter got the Roadster UMC which is the pre-cursor for the Model S Mobile Connector (MC) and its replaceable terminals.  The Roadster one continues to be more flexible than the Model S MC in that it still has ten choices for different terminals for the product, we bought the NEMA 14-50 and NEMA 6-50 adapters to work with the plugs that we have in our garage.

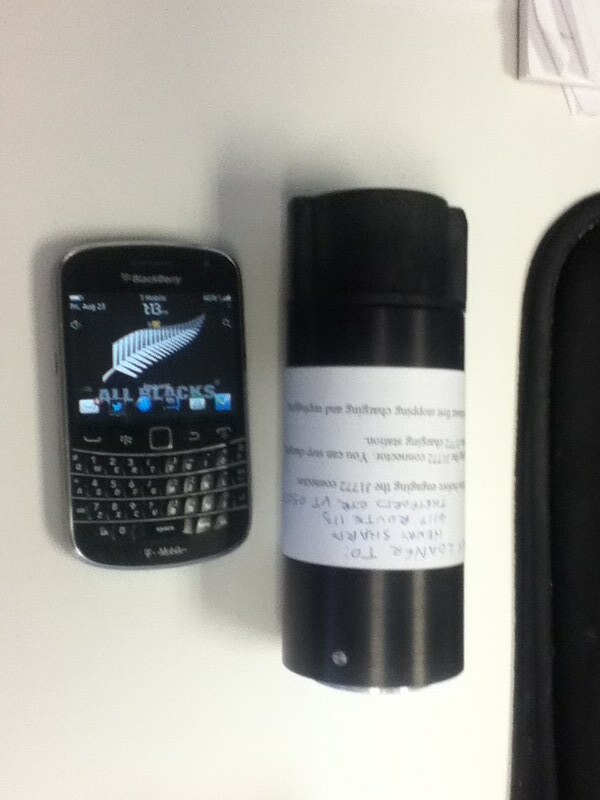
We also ordered Quick Charge Power’s Jesla, however this was before it was even a QCP product.  Tony Williams worked with me to customize a Model S MC to be a Jesla. I wanted something that would work with ANY EV out there and the Jesla would plug into any of the other outlets in the garage and in the exterior of the house for when we have visitors, like my mom and her Nissan Leaf.

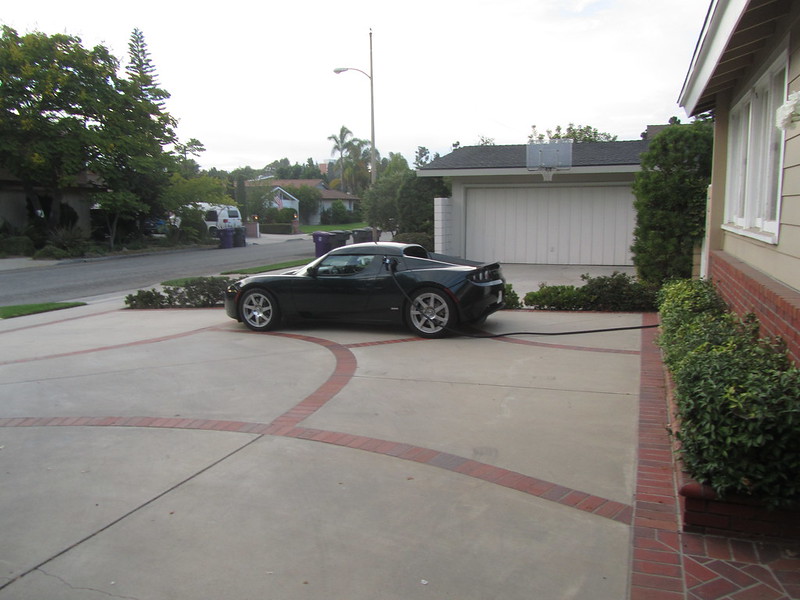
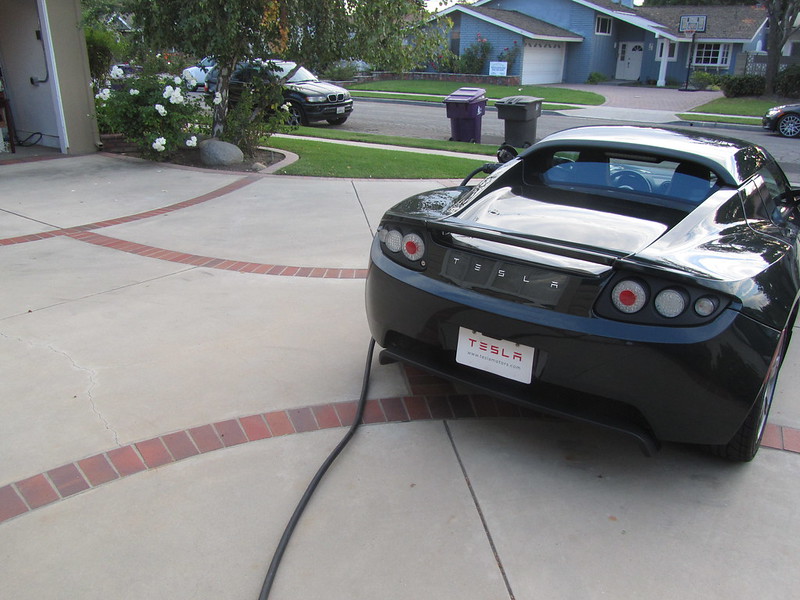
Here’s a picture of the Roadster charging on one of our exterior NEMA 14-50 outlets.

IMG_5007

IMG_5008

IMG_5009

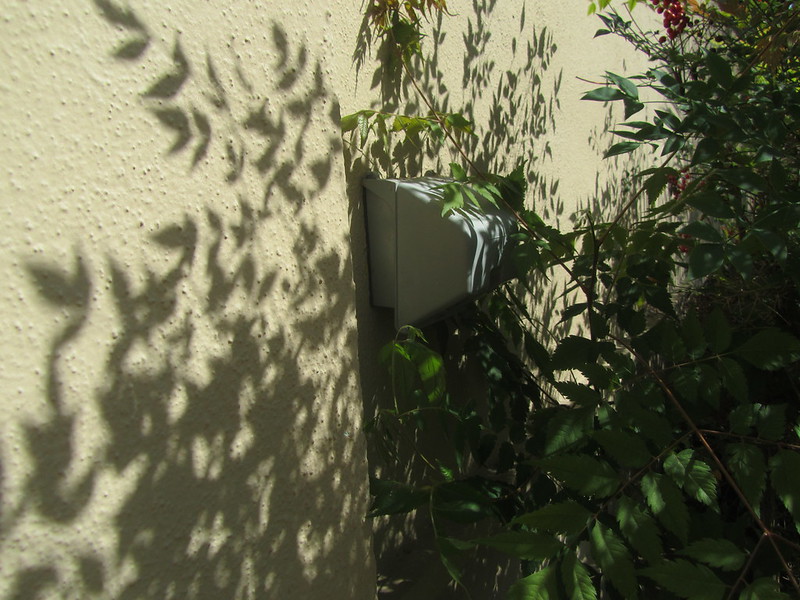
We had the same protective enclosure for the NEMA 14-50 that we installed on the exterior side of the house.  Additionally, should we ever decide to get an RV, we can plug an RV on the side of the house as well since this plug is dedicated to its own 50 Amp circuit.

Here is that outlet without the Roadster plugged into it.

IMG_7427

IMG_7428

That is the MC240 that the Roadster originally came with.  It has a hardwired NEMA 14-50 plug on the end of it.

IMG_5010

IMG_5011

IMG_5012

It’s just on our driveway, but away from blocking the garage. This was convenient, but not the ideal place for the Roadster, the noisiest that a Roadster gets is when it is CHARGING, so we make sure, in the interest of keeping the peace with our neighbor, to have an outlet ready for the Roadster in the garage.

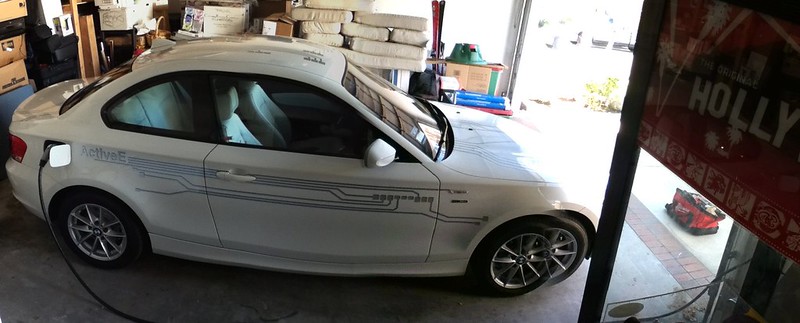
During the months between November 2013 and February 2014, we kicked the Active E out of the garage and it ended up charging on the driveway.

Here are a couple of pictures I took when we used to have all three cars, all plugged in and charging.

IMG_5394

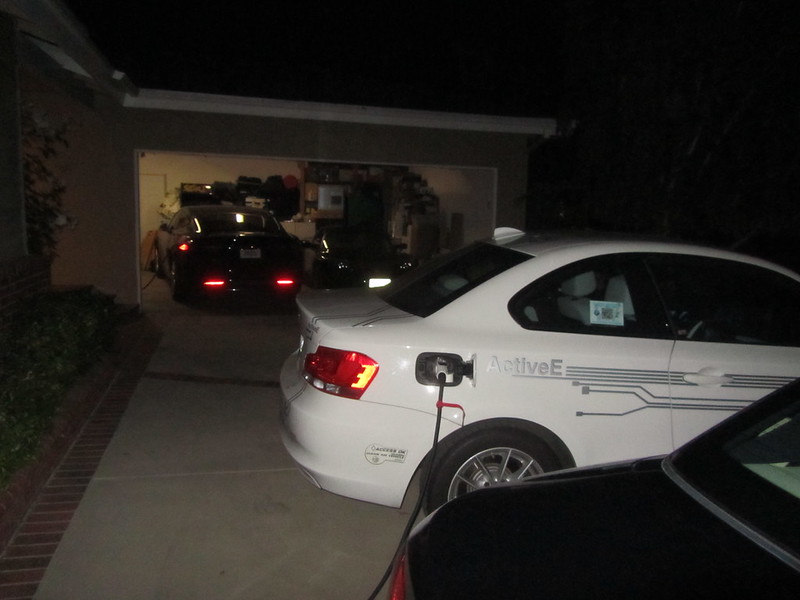
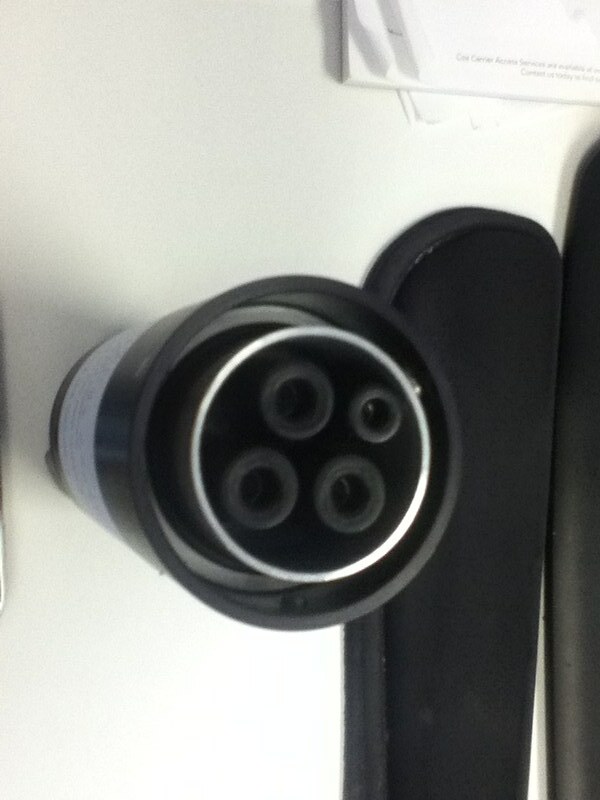
The J1772 EVSE that is plugged into the Active E during this duty cycle is the Jesla that I had asked Tony Williams of Quick Charge Power make for me.  It is great to see all the business that he has since built from the time that he made this product for me.

IMG_5395

IMG_5396

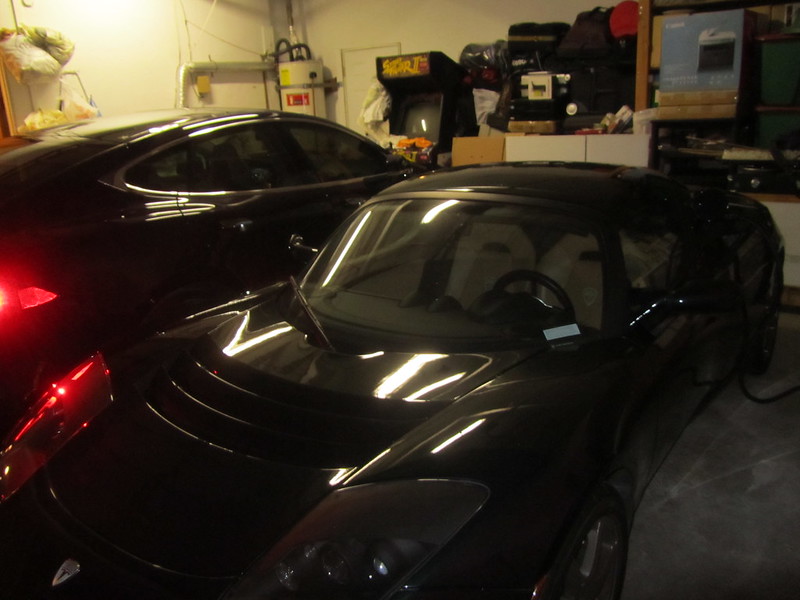
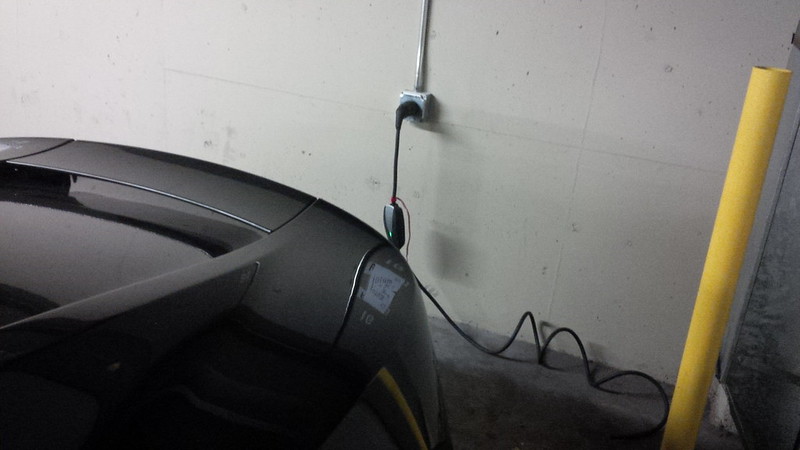
So, for several years we’ve had a great set-up at the house that allowed us to charge four EVs at once and not sure if we’ve ever have needed to do this… I do remember my mom visiting with her Leaf and charging it. The Model S was already charged, so I could just plug her Leaf into that J1772 (the original Chargepoint CT-500 from 2012). This photo was from Thanksgiving 2014, and the Active E was already back with BMW for at least 9 months at this point.  You can see the Roadster UMC plugged to the wall beside the Roadster (using a NEMA 6-50 at this point.)

Looks like the Family is complete... we can start Thanksgiving lunch! (3 EVs in our garage/driveway)

That’s a long way to catch you up to what we just had done this past weekend… in 2016.

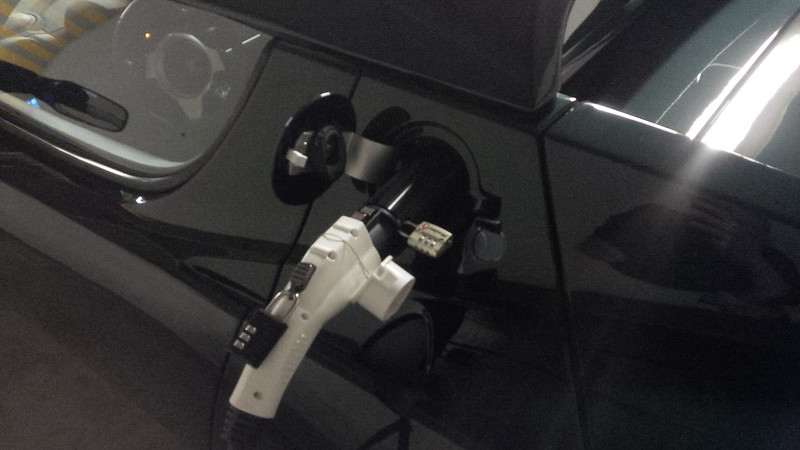
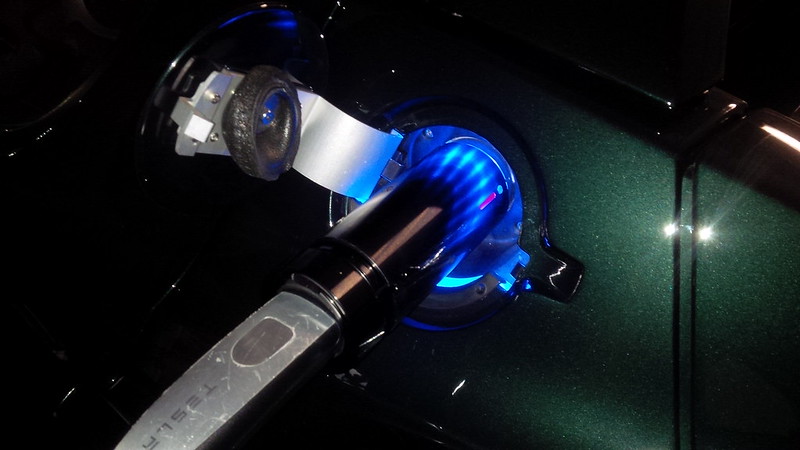
Well, a short while ago, we’ve had some charger challenges with the Roadster.  During testing, we kept swapping chargers to see the effects, and as a result of one of these tests, the MC240 that came with our car died and was not repairable.  Our service center provided us a replacement as a result of this failure because we still had our CPO warranty in effect. The MC240 is quite rare, so the service center provided us with a second Roadster UMCs.

When we took the “new” UMC home and plugged it in, it turned out that the new one was “flaky” (or, I suspect that there’s something with the Roadster, but we’re still figuring that out.)

Now, it has been difficult for Tesla to track down the UMC to begin with, and they are quite pricey, so, instead of trying to find ANOTHER Roadster UMC, I asked if they could just replace the dead MC240/flaky Roadster UMC with a new Model S/Model X High Power Wall Connector (HPWC.)

My point was that they were producing more of these HPWCs, the price for the unit has dropped significantly and is about a third the cost of another replacement Roadster UMC. The retail price for the Roadster UMC is $1,500 without a NEMA 14-50 connector, and adding that connector is an additional $100 for a total of $1,600, and the Model S/Model X HPWC is now $550 for the 24 foot model. Luckily, my logic was deemed to be a sound one, and we were able to get a 24 foot Tesla Model S/Model X HPWC (ver 2? (the one that can be daisy-chained)).  I figure that between the Roadster UMC, the Jesla, and our CAN SR and CAN JR, we have enough portable Level 2 capability for the vehicle.

Several weeks later, mid-last week, we get word that the replacement Tesla Model S/Model X HPWC was at the service center ready for pick up.

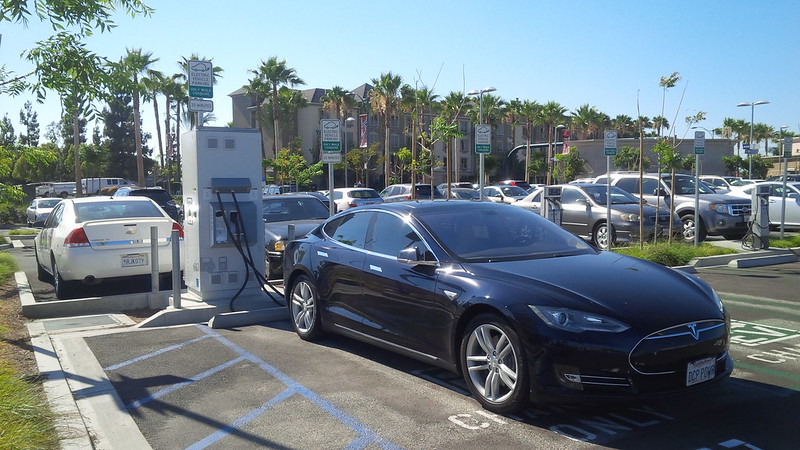
We went to pick up the box from the service center and take it home.  It wasn’t going to fit in the Roadster, so we took an S (the service center’s loaner as the Roadster is in the shop for its annual service) to bring this box home.

IMG_20160921_173153

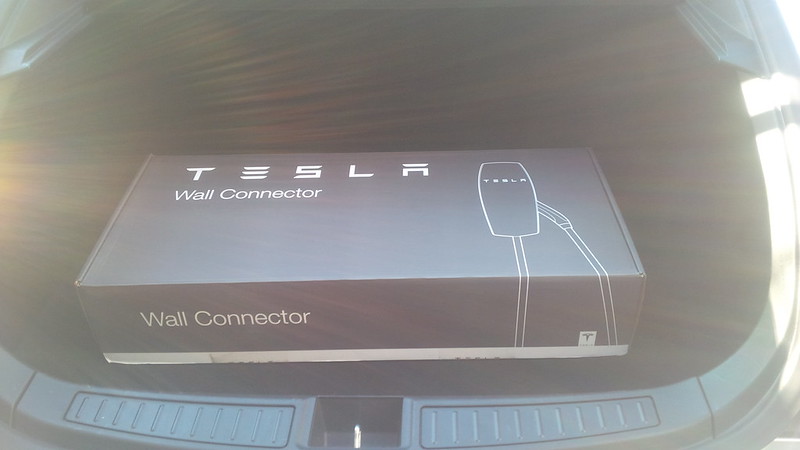
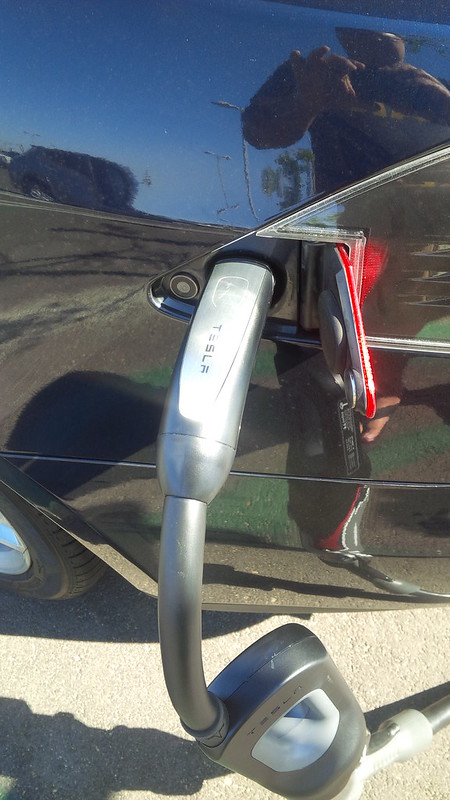
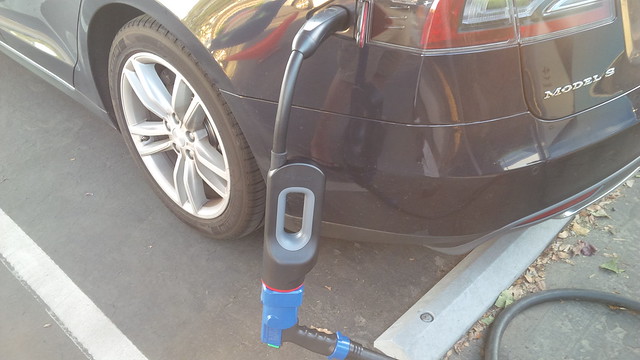
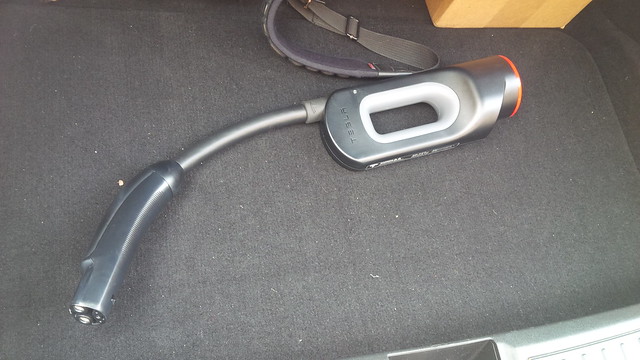
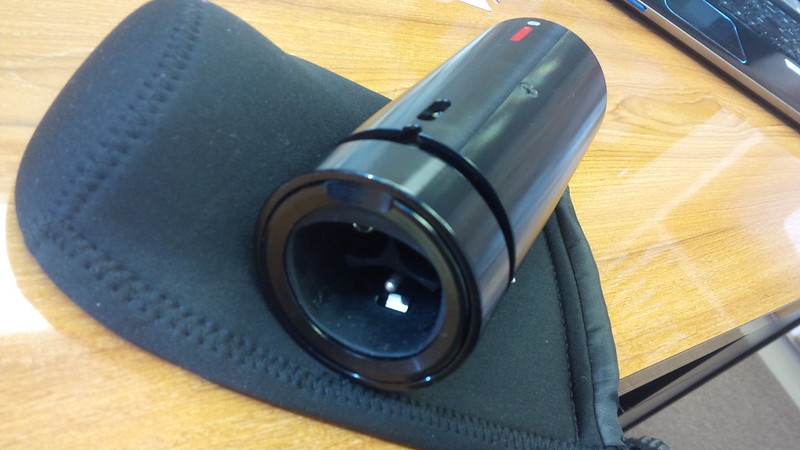
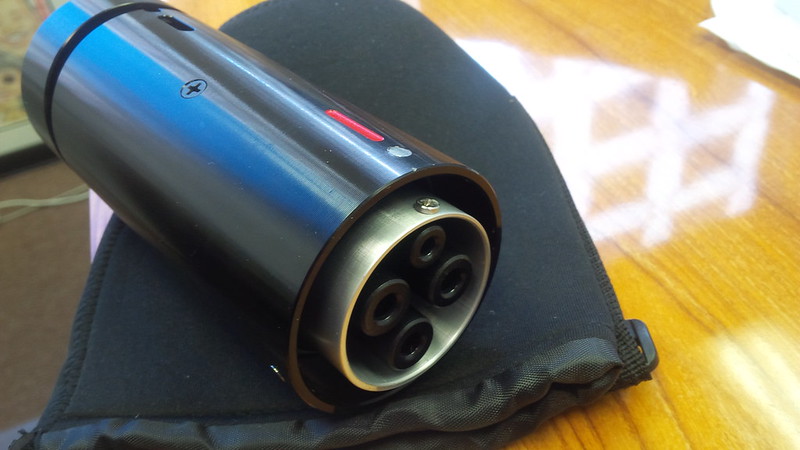
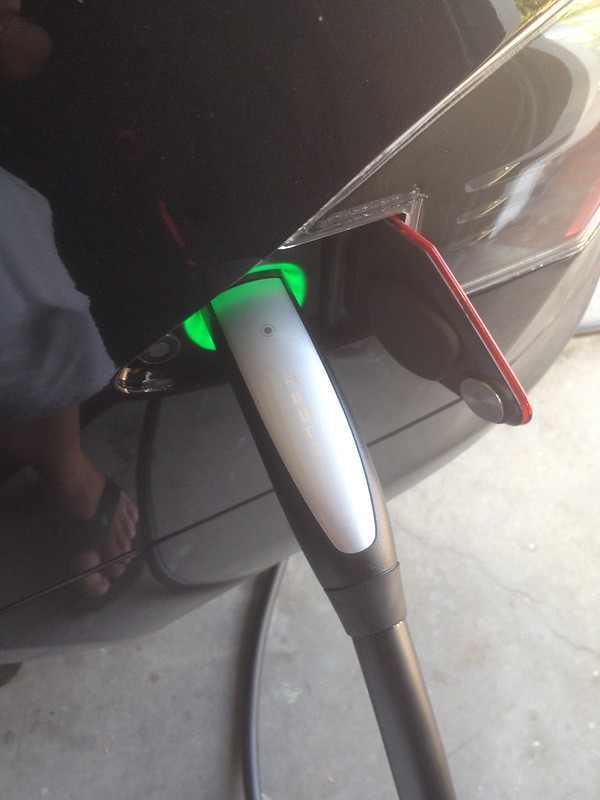
One thing about the Model S/X High Power Wall Connector is it is glorious and aesthetically pleasing EVSE.
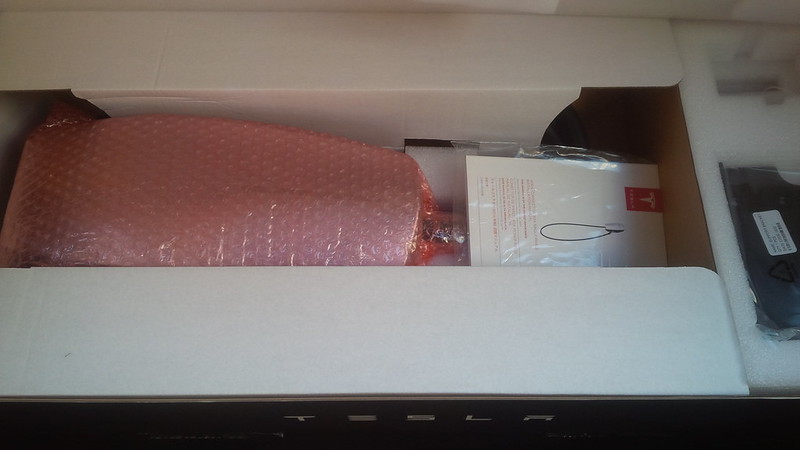
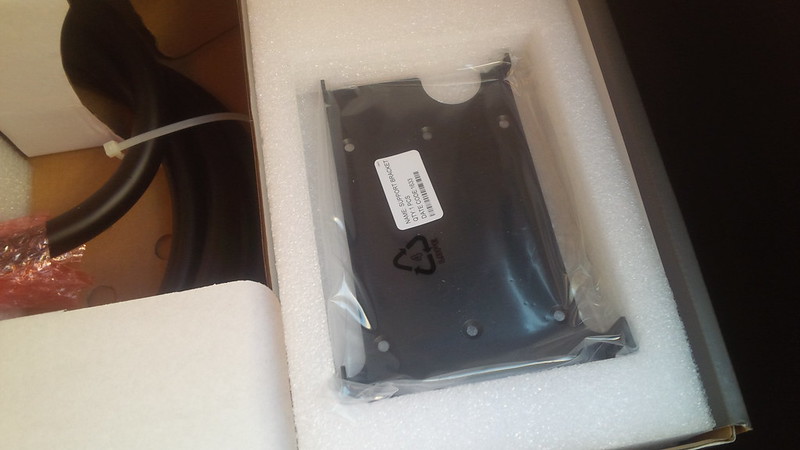
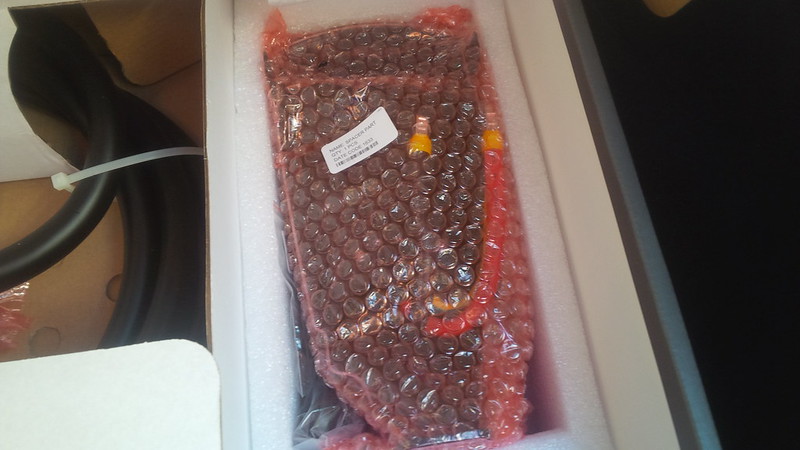
IMG_20160921_173212

Unboxing the HPWC…

IMG_20160921_173233

IMG_20160921_173237

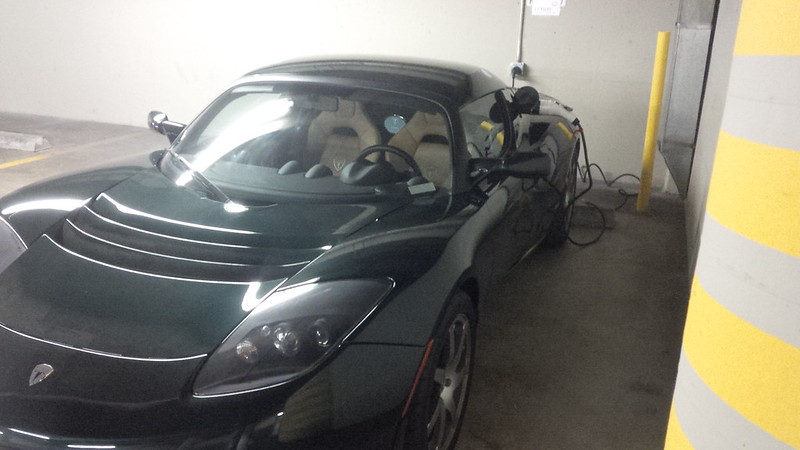
In order to install the unit, it had to be hardwired, and I’m not an electrician, remember.  I scheduled our electrician to do the work this past Sunday, September 25.

As I mentioned earlier, we ran 70A service to the garage for the Roadster and the two shared NEMA outlets (the NEMA 6-50 and NEMA 14-50). I figured to have him use that feed for the HPWC.  Since it seems that we’re now predominantly a Tesla family, I also had one other change that I requested.  Between our Tesla bias and the fact that there are now more EVSE providers that are selling NEMA 14-50 plug-in EVSEs, not just NEMA 6-50 ones, I went ahead and asked our electrician to replace the NEMA 6-50 outlet for the Roadster with a NEMA 14-50 one.

IMG_1205.JPG

IMG_1211.JPG

IMG_1206.JPG

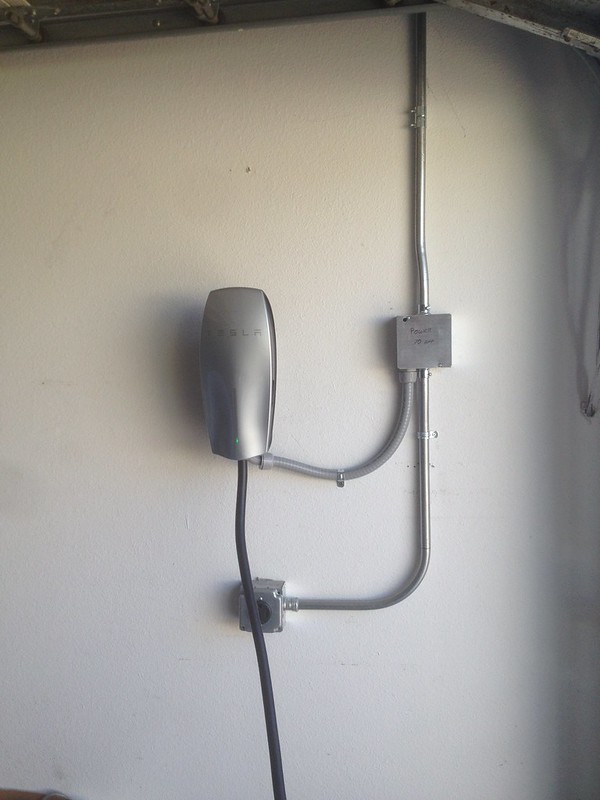
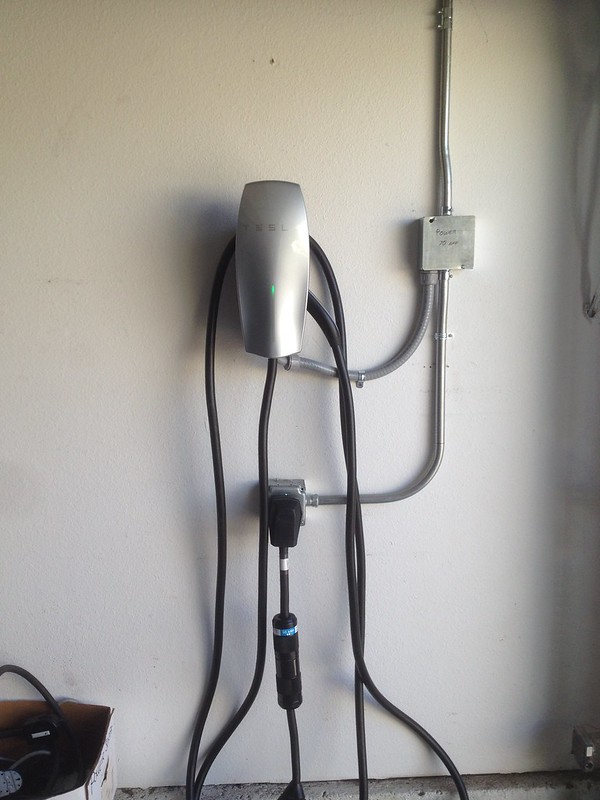
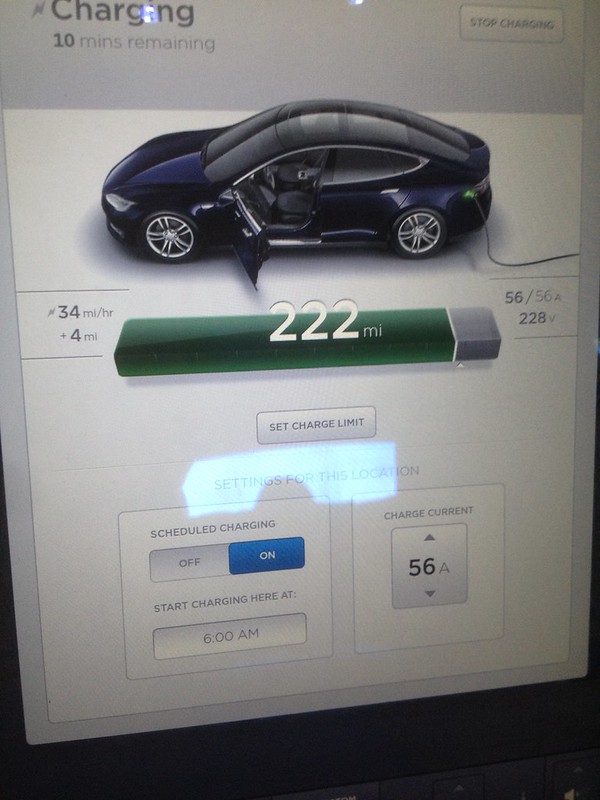
The new HPWC can go to 80A on a 100A wire, but it was cost prohibitive to run that wire three years ago.  I was glad that we ran 70A because we are now able to take advantage of 56A power for charging (when we’re not using the NEMA 14-50 outlets) we’re able to charge a Model S (with dual chargers, or enabled for greater than 48A for the newer ones) at 34 miles per hour.  The Model S normally uses the old reliable Chargepoint CT-500 at 30A and approximately 18 miles per hour of charging.  So, if we’re in a hurry or if the Chargepoint “misbehaves” we now have the means to “charge quicker.”

IMG_1209.JPG

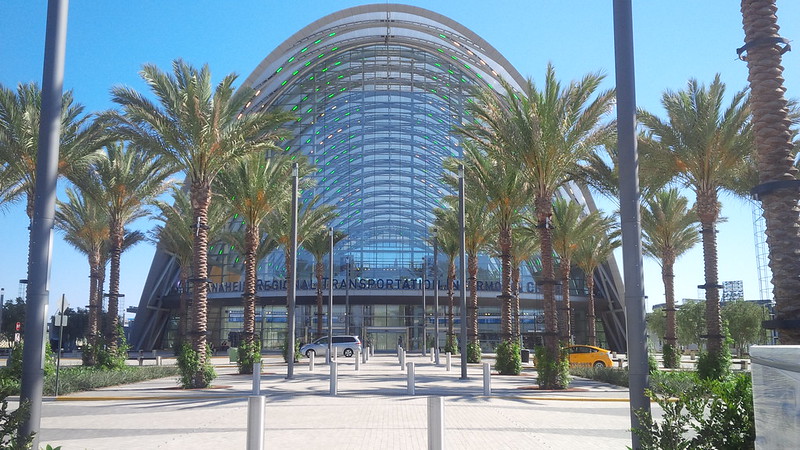
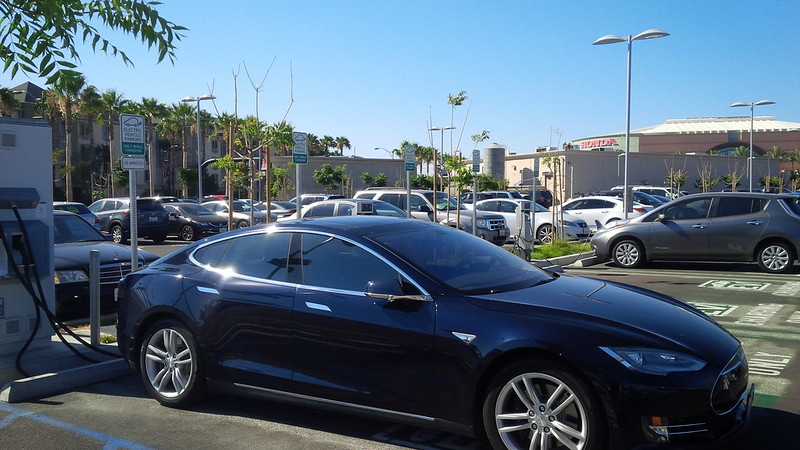
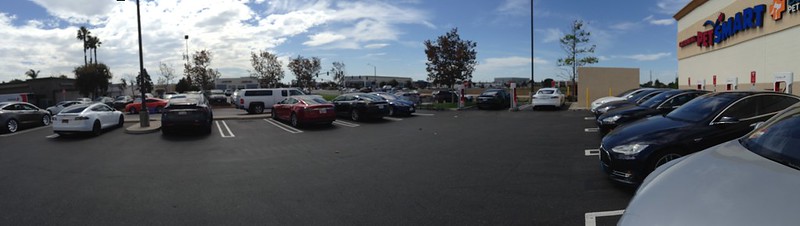
Besides, the nearest supercharger to us is Fountain Valley and though it is a supercharger, it is easily the busiest one in the area as is evidenced by this photo around 1pm on 9/27/2016.

That’s six cars waiting and eight charging (there were seven cars waiting just before I took this picture.)

IMG_0492.JPG

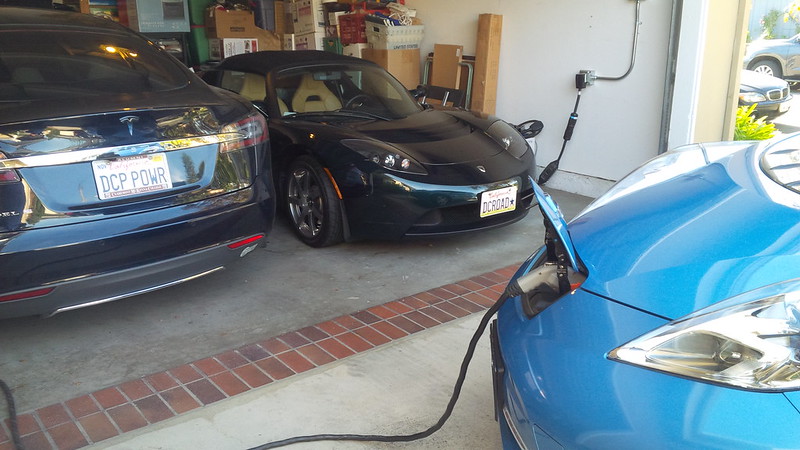
Additionally, we still have the NEMA outlets (now all 14-50s). We just have to manage the load effectively, and safely. I could use the advanced features of the new HPWC and daisy chain them in the future, but I think we’re OK with the way we’re set up for now. In the meantime, we just have to do the math and run a total of 56A on the feed. One requirement currently is that all these vehicles will have to be Teslas because it’s difficult to limit each feed to only 16A…  We can, conceivably charge two Teslas at 20A and a Chevy Spark, Chevy Volt, or 2011/2012 Nissan Leaf on 16A of power.  As we mentioned earlier, many EVs now run at 6.6kW or higher and that’s 32A of power on 240V.

So, in 2016, we are now able to plug in five vehicles to charge at 240V service in our home…

Looks like we’re ready for the rEVolution and hosting an EV meetup…

Or to have family visit us…  My sister and her husband just added a Volkswagen E-Golf to their garage a few months ago and, as expected, my gearhead brother-in-law has been “digging” driving electric. (I think that he’s garaged his Porsche ICE and taken to driving the E-Golf places.)

Furthermore, once we get our Model 3 reservations delivered, we’re ready for those as well.  We might need a bigger driveway and garage!

Update to CHAdeMO Instructions and Review – Efacec and Greenlots Combo CHAdeMO/CCS

My original instructional post for using CHAdeMO only covered two different CHAdeMO chargers. The Eaton and the Nissan CHAdeMO chargers. Yesterday, I found a combination CHAdeMO/CCS charger from Efacec (the Evapower EV QC 50) at the ARTIC, the Anaheim Regional Transportation Intermodal Center.

IMG_20150715_163343

I first noticed the ARTIC from the side of the 57 freeway as I zoomed by on my way home. It is a strangely modern piece of architecture on the same exit as “the Pond” and Angel Stadium. As we passed it on that first drive and on every subsequent drive since then, my wife and I often wondered what it was. It looked like a Disneyland monorail station, except Disneyland was several miles away from the sporting venues in Anaheim.

In preparing to write this update on how to charge using the equipment at this location, I ran into several links about the site that was not very positive about this $189 Million Transit hub.  From OC Weekly when it first opened.  To an LA Times review a week later.  To an update on its operational challenges from the OC Register, half a year later.  Regardless of what the critics may say about this location.  Many of what used to be free to charge CHAdeMO L3 chargers have now been converted to paid use and it is comforting to still have options that currently do not charge for the privilege to charge at higher rates of speed.

IMG_20150715_162731

IMG_20150715_170523

As mentioned, this particular DC Quick Charger is a combination CHAdeMO/CCS charger. What this means is that there are two different “heads” to the Quick Charger, the CHAdeMO one which the Mitsubishi iMiEV , Nissan Leaf, and the Tesla Model S (with an adapter) uses, and a CCS (AKA the “Frankenplug”.) The CCS one is what the BMW i3, Chevy Spark, and others use.

IMG_20150715_162832

The CHAdeMO is the one on the left and CCS is the one on the right.

In my original post, I had yet to use a CHAdeMO that has been converted to a pay system. During our trip to Vermont, we actually used a couple of Nissan CHAdeMOs that have been converted to a pay system and require an RFID and payment to charge.  However, we lucked out when the NRG eVgo CHAdeMO was still in its introductory free period.

In addition to an RFID Card, the Efacec system at ARTIC also uses the Greenlots App to initiate the charging session. However, there are a few strange things about this particular location. Though there are few Greenlots locations on the map, this particular one does not show up in it.

Since the system has two ports, there is a set of CHAdeMO and a set of CCS instructions.

IMG_20150715_163202

We’ll be following the CHAdeMO instructions.

IMG_20150715_163112

So, aside from downloading the App before charging at this location, I went ahead and followed most of the instructions and steps that I wrote in my original guide.

We pick up at Step 5, we still need to make sure to follow Step 4 and align the notches appropriately, it won’t fit otherwise.

Step 5 is to mate the CHAdeMO to the CHAdeMO to Model S Adapter.

So, on the Efacec L3 charger, it looks like this.

IMG_20150715_162959

Like the Nissan CHAdeMO adapter, make sure to pull the trigger on the Efacec CHAdeMO to secure the piece to the adapter. Now, with these App initiated.

Step 6 is to plug the Adapter to the Model S. Here is the Efacec CHAdeMO pictured:

IMG_20150715_163009

It looks similar to how the Eaton sits on the Model S.  I use the cable to push the Model S to CHAdeMO adapter up so that the weight is on the CHAdeMO cable rather than pulling on the Model S port.

IMG_20150314_181655

Now where we differ from the original steps come in a new Step 7.  Now with this new step, all the other steps get pushed back one.

Step 7 is to authenticate with the charging network.  With this Greenlots App, I scanned the QR Code on the charger. If we had the RFID card, you just swipe it. Additionally, it seems that there is also a Credit Card reader built-in to the charger. However, since this location is free, I chose the QR code method.

IMG_20150715_162811

Step 8 is to start the charge. With the method I chose, the Greenlots App shows a virtual button to choose which port to initiate charge with. So, I started the charge for the CHAdeMO, which is on Port 1.

IMG_20150715_163104

Aside from starting it from the App, the charger still presents the user with a physical button to complete the charge initiation on the Efacec charger. The soft button on the upper right becomes a START button.

IMG_20150715_163116

Step 9 Go back to the car or go about your business, but put a note on the car if you do leave so that anyone who needs to use the charger can contact you.  If you choose a note, let me recommend the EV Card from Plug In America or Jack Brown’s Take Charge and Go tags. Additionally, I would recommend checking into Plugshare so that anyone looking at the location remotely will know that someone is charging, at the moment. On the display of the charger you will notice that the battery capacity and start of charge shows up.

IMG_20150715_163138

Green light on the Model S chargeport tells you that the car is charging.

IMG_20150715_163220

If you go back to the car, you will notice the charge speed of CHAdeMO. As opposed to the Eaton and Nissan chargers, the Efacec at this location was providing me with 152 to 156 miles per hour. I forgot to photograph the screen on the Model S, but I did take a photograph of the charger display before it completed.

IMG_20150715_170509

There is no estimate of how long the charging will take, but it does show the elapsed time charging, the amount of energy provided to the car and the car battery’s state of charge (SOC) percentage in real time.

The Greenlots app does a funny thing somewhere around the 30 minute mark, the app does not provide the status of the current charging session.  Before the 30 minute mark, it actually provides a snapshot of the charging session that is anywhere from most current status to as dated as a few minutes (it batch updates).  When it does provide this status, I believe that I saw it provide for a method to STOP charging from their app.  However, after the 30 minute mark, the session disappears from the app.  In order to stop the charging session, one needs to press any of the buttons on the charger directly.

Since no one was waiting, and I was just hanging out at the car, I figured to get it close to full.

Step 10 When done using the charger, press the STOP button

IMG_20150715_171758

When I press one of the buttons and the stop is displayed, the screen goes from black to white. I figured to wait until I got to 47 minutes of charging.

IMG_20150715_171833

Then press the Stop button (the upper left soft-key).

If you press that button the screen updates itself, first with the following “Ending Process message”.

IMG_20150715_171836

Then the charge ended by user message.

IMG_20150715_171849

Since I registered for an account, I actually receive an email and text message with the charging sessions statistics, cost, kWh, and time at charger.

From: “do-not-reply@greenlots.com”
To: {Me, the Happy Greenlots user}
Sent: Wednesday, July 15, 2015 5:18 PM
Subject: Unplug / Charging Ends

Your vehicle has stopped charging at 43100, ARTIC. You have used 29.61 kWh for 0 hour(s) 47 minute(s).

Billing Details

Sale Amount : 0.00 USD
Tax & Fee : 0.00 USD
Transaction Charge : 0.00 USD
Total Cost : 0.00 USD

Thank you
The Greenlots Team

Step 11 Detach the Adapter from the charger’s CHAdeMO cable.

The Efacec CHAdeMO is similar to the Nissan charger in that there is a button on top to detach it from the Model S cable.

Step 12 Return the cable back to its proper location.

IMG_20150715_171956

Step 13 Return your CHAdeMO to Model S Adapter back to your car and drive off.

IMG_20150318_164010

If you’re interested in more pictures of the CHAdeMO to Model S Adapter, here’s my flickr stream. And if you’re looking for the instructions of the same things on a Nissan or Eaton Charger, here is the link to the original instructional post for using CHAdeMO that I wrote a few months back.

IMG_20150715_163331

Since this is a combo CHAdeMO/CCS station, I don’t know if it is one of those sites that only lets one car use the DCFC on EITHER the CHAdeMO or CCS OR if it is one that lets two cars use both at the same time. No one else showed up while I was there the 47 or so minutes at the site. The only other EV was a Leaf that was using the L2 J1772 stations that were next to the DCFC (pictured in the background below.)

IMG_20150715_163847

Something to see some other time. Seeing that many of the DCFC are available for at least $5 to initiate charge, I probably will only use this “in a pinch.”

The CAN JR and The CAN SR… Must have accessories for the Tesla Roadster

Elon Musk and Tesla Motors tweets regarding the upcoming demonstration of upgrading the Tesla Roadster to a 400 Mile Range has increased the interest in Roadster ownership. To continue further the previous post upon receipt of the CAN SR a few days back. Each version of the CAN is sold for $695 each and is well worth it.

What makes the CAN from Henry Sharp a valuable accesory is that it allows Roadster owners a nicer/smaller adapter to standard J1772. The Tesla produced product is rather bulky and a car like the Roadster space truly is a premium.

Here is a photo from Tesla (from their shop) of the Tesla produced adapter.

Tesla Roadster to J1772 adapter from Tesla

Whereas the CAN from Henry Sharp is rather compact.

This first picture is the J1772 side that the Roadster driver uses to plug the J1772 into.

IMG_2624

This second picture is the Roadster side that the Roadster driver uses to connect to the Car.

IMG_2625

You can see that the CAN is not much larger than a Blackberry Curve Telephone.

IMG_2623

And here is the CAN attached and charging a Roadster. To ensure that the CAN does NOT walk away at public stations, there are slots in place to place a small padlock into it.

IMG_20141107_080525

It works great with the JESLA from Tony Williams of QuickChargePower.

IMG_20141107_080519

IMG_20141107_080505

Henry’s been making the CAN JR for a while and have just released the CAN SR. The naming convention of JR and SR means that he’s converting J1772 to Roadster (for the JR) and SR is converting Tesla Model S to Roadster. Henry reluctantly released the SR because the testing showed a 95% success factor for Roadster 2.x and 99% success with Roadster 1.5 between Model S Chargers and Roadsters. (you can read the SR thread on teslamotorsclub.com)

Before purchasing the CAN SR, I would highly recommend that Roadster owners get the latest Firmware upgrade. There is a known bug between unpatched Roadsters and EVSEs that charge greater than 70 Amps. A fully configured Tesla Model S HPC is configured to run at 80 Amps and the Roadster, if unpatched, would be confused by that issue. The patch for this error has the Roadster understand an 80 Amp signal and drop the rate to 70 Amps, which is the maximum speed that a Roadster can handle.

This next picture is the Model S side that the Roadster driver uses to plug the Model S nozzle into.

IMG_20150107_103722

This once again is the side that plugs into the Roadster.

IMG_20150107_103734

Henry sends each CAN with a neoprene bag to protect and store the adapters into as pictured.

IMG_20150107_103752

Here is the CAN SR plugged in and getting ready to charge in our garage.

IMG_20150107_224844

IMG_20150107_224831

Lastly you can see the detail of the construction of the CAN SR. It’s a great accesory.

IMG_20150108_084734

IMG_20150108_084729

So, how do I use these adapters.

For the CAN JR

1) Attach the CAN JR to the Roadster
2) Plug the J1772 into the CAN.

IF in a public charging spot

3) I insert the padlock into the slot for the CAN to lock it in place.

4) If I need to interrupt charging to leave, I press the stop charging button on the VDI of the Roadster OR stop on the charger, otherwise, if it IS stopped, then proceed to the next steps.

IF in a public charging spot

5) I take the padlock off.

6) Unplug the J1772
7) Unplug the CAN, put can in the bag, and put the bag in the Roadster.

For the CAN SR

1) Attach the CAN SR to the Roadster
2) Plug the Model S nozzle into the CAN.

IF in a public charging spot

3) I insert the padlock into the slot for the CAN to lock it in place.

4) If I need to interrupt charging to leave, I press the stop charging button on the VDI of the Roadster OR stop on the charger, otherwise, if it IS stopped, then proceed to the next steps. I have not yet tried this, but according to Henry, I can pull the ring around the Model S nozzle to stop charging as well.

IF in a public charging spot

5) I take the padlock off.

6) Unplug the Model S adapter.
7) Unplug the CAN, put can in the bag, and put the bag in the Roadster.

There are very few “must haves” for the Roadster, and the CAN JR and SR are two of the things Roadster owners should consider owning.

A few more weeks left…


In flight and on my way home from a vacation in NYC and just figured That I have about eighteen days left to drive my ActiveE.  It’s a bit surreal. I drive too much to lease any vehicle and would have been crushed by the mileage penalty had the ActiveE not included the unlimited mileage option…

Still waiting on final word on what the i3 Electronaut Edition will look like, but just got the good news that my office move will give me the opportunity to install a NEMA 14-50 or NEMA 6-50 outlet in my parking spot.  I feel privileged that my CEO approved this expense, but note how silly certain locales are at thinking about workplace charging. Barring any local city ordinance, I should get the NEMA outlet installed before we move at the end of the month. As long as the electrician filing the paperwork specifies that it is just an outlet we should be good. The previous landlord (and location) had tried to install two Chargepoint EVSEs last year, but backed out when the city ordinance required a separate feed from the utility for the additional 60 Amps that EVSEs would have drawn (and thus cost prohibitive). To compare, this change in civic requirement increased the outlay from the landlord from around $10,000 to approximately $30,000. The NEMA outlet will cost around $1,000 because of the length of the cable run AND allow for 40A charging (for vehicles that support that).

Using my converted Model S MC that TonyWilliams converted for me (now called JESLA) I will be able to charge many J1772 EVs at the office In my own parking spot. I know for a fact that aside from either Tesla (Roadster and Model S), I have been able to use the JESLA with my ActiveE and my Mom’s Nissan Leaf. Additionally, TonyWilliams modified the Tesla Model S MC to work with the 2nd Gen RAV4EV.

Basically, having access to workplace charging (in my own spot) will free me up again to look at my commuting EV options. If I go i3, I’ll be able to go pure BEV. Though, the REX will probably add to the resale value of the vehicle. I can go Fiat 500e and not worry about it or perhaps babysit my mother’s Leaf when she takes a vacation. My EV friends in Europe often charge in what they call “dumb” outlets up to 32A and that’s basically the freedom I get with the JESLA and a NEMA socket. Having communicated with fellow ActiveE high miler Todd Crook, I am tempted by the unlimited mile lease he has on his 2nd Generation RAV4EV purely based on economics. The better half doesn’t like the car. If my number gets called for the Honda Fit EV unlimited mile deal, that would also be as tempting. Though my old brand loyalty to Honda can reassert itself. Decisions, decisions.

So, on the 24th of February, 2014, the day after my ActiveE is ripped from my hands, I start my new office location with an outlet that would’ve been a lot more convenient than my 3/4 of a mile walk to charge. That’s the kind of irony that is worthy of Beckett, in fact, I would label that closer to absurdity. Additionally if I decided to skip other EVs and stick with the Roadster for the better half and Model S for my commute. I really won’t need to plug in all the time… But, could keep the Model S on 50% daily charges so that I can maximize battery health. It’s a wild, wild concept.

Stay tuned, dear reader, ’cause I don’t know what I’m going to do…

End of year and EV tax credits…


So…

One of the negatives of the end of year is that a lot of folks who have procrastinated are trying to fit as much stuff in before the new year hits.

One of the things that affect Tesla owners during this time of year is the probability of being provided a nice P85 Tesla Model S for a loaner is less than at other times of the year.  Why is that?  Well.  Tesla has provided the top of the line Model S for its loaner fleet in the explanation that they did not want any Tesla customer to be deprived of a vehicle that is less capable than the vehicle that they bought from Tesla.  (of course the car they do provide is limited to 80 mph, but that’s a small point.)  As a result, when the Roadster or Model S is in service, I have gotten a P85 loaner vehicle from Tesla.

However, the last time I’ve had service done on my Model S, I was provided with an Enterprise Rental Car ICE Chrysler 200 or was it a Chrysler 300.  Either way, it was no Model S.  Now this was expected as we’re nearing the end of the year and Tesla makes its loaner fleet available for near immediate purchase from interested parties.  When we finalized our Model S order in the summer, we could’ve picked up something similar to our configuration a week out from the time we finalized.  I was, at the time, complaining about the increase in accessory prices and my contacts at the Tesla store in Costa Mesa could have provided a loaner purchase at a discount.  Additionally, to cover the mileage that the loaner vehicles would’ve endured, Tesla credits so many cents per mile from the sales price.

We decided against it, and thus I did not get the vehicle.

Surprisingly, since Tesla is the manufacturer of said vehicles and the loaner fleet have manufacturer tags, they are all eligible for the new purchase benefits.  These benefits are the Federal Tax Credit and whatever State incentives you may be eligible for.  (in California, this is a rebate for $2,500 for the purchase of a pure Battery Electric Vehicle of a certain kwh capacity.)

So, back to the procrastinators and Tesla’s loaner fleet.  People that want the full tax incentives and obviously won’t have their vehicles built and delivered by 12/31 still have an option to get into a Tesla and get the benefits due to a new EV purchaser.

On a different note, other tax credits are set to expire this year.  Namely the installation of an EV charging station.  In the past, it would seem that Congress would renew the $1,000 residential credit for installing an EV charging station in one’s home.  This year, apparently they did not extend this and as a result, if you, dear US based reader, are planning on purchasing an EV soon and need to install a charging station anyway, go ahead and do so prior to December 31, 2013.  You may be eligible to have up to $1,000 credited back to you.   If you’re a COMMERCIAL location, the credit is even more generous.  It is 30% of the costs up to $30,000.  However, it is now December 19, 2013 and seeing that commercial locations tend to get bogged down by such things as building permits, etc. I wonder how probable it would be to install these things by the end of 2013.

Leviton EVSEs and BMW Active E

Regular readers may note that I reported a video many months ago regarding some weird grinding noises when I plug my Active E to a Ford branded Leviton charger at a dealership.  It would start the charge, but this really unnerving grinding sound occurs.  The first time this happened, I unplugged my Active E and left the dealership without much of a fuss.

I experienced the same grinding sounds months later at ANOTHER Ford dealership.  This time, it was during the process of assisting my mother look for her first EV.  Which resulted in her choice of the 2013 Nissan Leaf SV in Ocean Blue.  This time, I needed the charge, so I left it in while we did our test drive and negotiations.  Apart from the grinding noise, the car did take a charge and that was that.

In preparation for the pending removal of access to BMW’s EVSE when the i3 is launched, I have started looking at several “transportable” EVSEs and decided on purchasing a Leviton EVB40-PST.  This is a 40Amp 9.6kw EVSE that uses a NEMA 6-50 plug to deliver 40 Amps and was a good way to future protect from chargers that are up to 9.6kw and greater than the 6.6kw chargers out there.  The Active E was rated at 7.2kw and I wanted to make use of that and the i3 is supposed to be at 7.4kw and I wanted to be ready.  So, I had my electrician wire up another EVSE location a few days ago.

Well, it looks like there is an incompatibility between the Leviton and ActiveE.  The symptoms are similar to the ones found at Ford.  However, this time right after the grinding sound starts, the fault light comes on and the EVSE stops charging.

So, I guess I’m returning this one to Amazon.